Background

Friday, March 30, 2012

Paperific 2012 - Cards for AED

A new day, a new show, and new papers... what more could a girl ask for??

These gorgeous papers from Alison Ellis Design are PERFECT for invitations etc...
Introducing "You're Invited"
This card outside I used a rose from My2Angels and a 5petal flower from Crochet By Kim.

This pop-out cake was care of a Hot of the press template, the glitter from Alison Ellis Design, Purple pearls from Flourish With a Bling!

Tim's rosette die with more gorgeous diamonte's from Flourish With a Bling.

This range also has a number of images on 1 sheet - card blocks, this are great!  Just added a charm from My2Angels to finish this one off :-)

The cream and gold papers are DIVINE!!  This is the Tattered Rose die assembled loosely as per Tim Holtz.

Another view of the cream and gold - you can see the gold embossing here, the embossing powder is also from Alison Ellis Design.

Please ask your local stockists when they will have these available as they are shipping now and if they aren't planning to get them yet - ask them to!!

Thanks for stopping by :-)
Jen

Wednesday, March 28, 2012

Paperfic/Easter Sneak Peak :-)

My latest 'big' project for AED for the new papers.... an OTP

And my latest card for AED for the new papers - a popup card

Am completely pressed for time so only just had the chance to post this for you, I can't wait for the reveal just after paperific!

TFL - Mwah! XXX
Jen

Tuesday, March 27, 2012

Paperific is just around the corner!!

It's that time of year again everyone! Paperific starts on Friday and I am once again going to be there with Alison Ellis Design for all 3 days :-)


Amongst the moving and unpacking and working, I have been madly creating samples and organising demo stuff for the new lines.... They are available now for ordering by your local retailer - so send them to Alison Ellis Design now to place their order!  You will not be disappointed.  A4 sizes, geared specifically for the card maker and invitation specialist - here's a peak :-)


I'll be back with more later - more papers, more samples, new stamps, and some OTP!!!

TFL - Mwah! XXX
Jen

Monday, March 19, 2012

Twisted Sketches Cards #97

Another one for the fantastic sketches over at Twisted Sketches;

Here's the sketch for #97, the twist was "Yellow"
And here's my little interpretation :-)

And the customary close-up! 


Ingredients:
Twiddleybits - Banner
Twiddleybits - Itty bitty nero alphabet
Twiddleybits - Heart
Patterned Paper - Pinkpaislee - old school (from Scrap Sanity)
Yellow Ribbon from goodness knows where!
Stazon ink - black

Thanks for stopping by - why don't you join in, I'd love to see your interpretation of the sketch too :-)

Friday, March 16, 2012

Hello again!

It feels so blooming awesome to be moved in, connected to the net, and set up in my new studio.  I can't wait to show you the things I did just before moving.

AND Paperific in Melbourne is only 2 weeks away!!!  I received some awesome new papers from Alison Ellis Design yesterday that I can't wait to play with :-)

A couple of things to deal with from the previous property but then I am FREE of crap and stress!  I LOVE living closer to work, the kids love walking home, and playing with their friends in the afternoon, and I love being close to the river again!  I have even started walking every morning!!!!

Thanks for being patient with me during the move - I have some exciting things planned and I can't wait to tell you but we'll have to wait just a little bit longer :-)))

Thanks for dropping by
Jen

Wednesday, February 29, 2012

Twisted Sketches Card #95

It's A Girl!

The latest Twisted Card Sketch is no 95 - and the twist is "Leap".  I thought what a great idea to do a birth card for a little baby girl!

Here's the sketch -
And here's my take on it :-)

and the customary close-up :-) You can see the gorgeous flowers Maria Featon made me for the Scrap Sanity flower swap!

Ingredients:
Cream Shimmer Cardstock
Prima Botanicals PP - Adore
Flowers by Maria Featon
My Favourite Things Open Scallop Doily
1 1/2 " hole punch
Tim Holtz Distress Ink - Aged Photo
My2Angels - Heart locket Charm
Papercraft Clear Cling stamps - Baby
Stampin Up Stamp n write Marker - close to cocoa
Green Tara brown flowers.

Thanks for stopping by!

Crazy For You and Scrap Sanity!

As you may already know, the lovely Tiff Sawyer asked me to be on her design team as her card specialist over at Scrap Sanity.  I am honoured and excited to be part of her fabulous team and vision for the future!

Every month I will be making at least two cards using products available at Scrap Sanity.  The first will be a simple folded card, portrait or landscape.  The second will be using the same or almost the same set of supplies to make a card that is not-so-normal.  I have a number of construction cards to get through by December and have started my first post with an Easel Card.

Please excuse the late night photography and dodgy blogpost while I should be packing as I move house Saturday!!

Here is the normal card -
A Simple Card using:
Basic Grey Kissing Booth PP
Red c/s
My Favourite Things - A Layered Label die
Some old rub ons i had laying around created the greeting
Flourish with a Bling pearls in antique gold
Tim Holtz Alterations Die - Tattered Floral (for the rose, instructions below)
             add for the construction card - Flourish with a Bling - Chloe Antique Gold

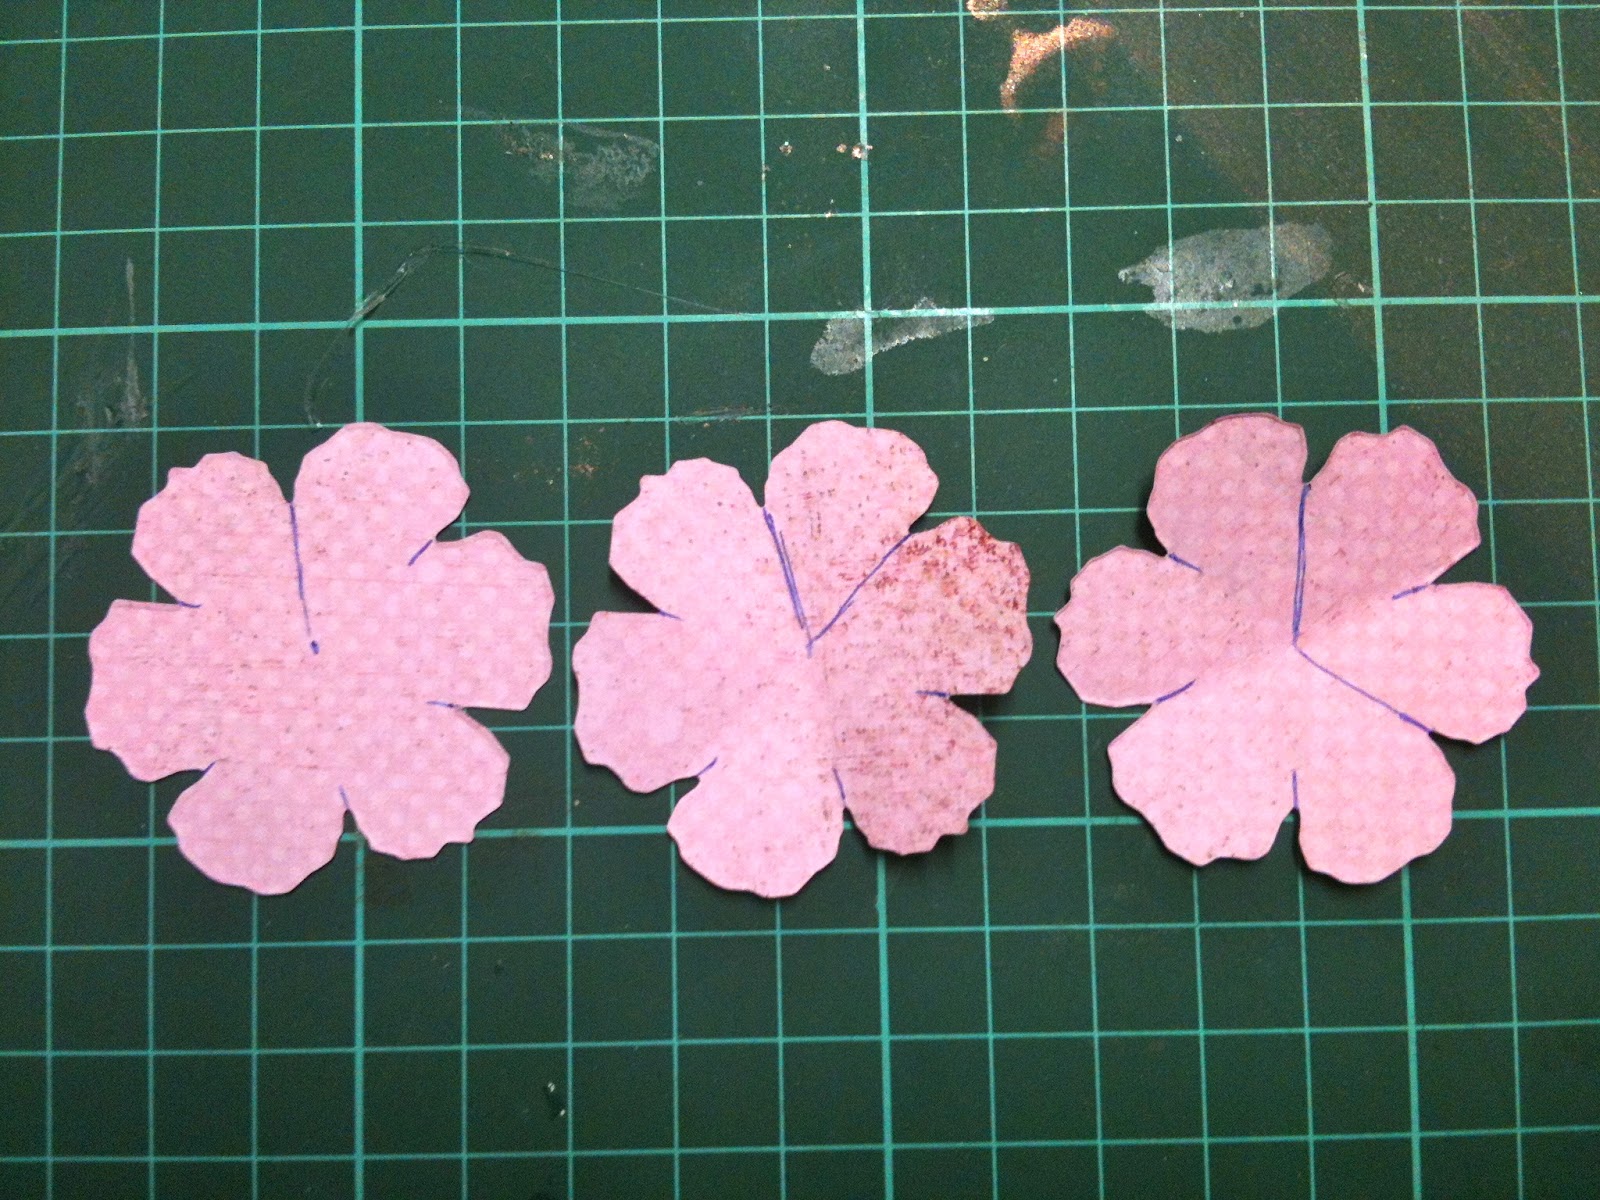
step 1 - cut 3 of the large 6 petal flowers..
 step 2 - cut a line to the centre, then one petal off, then 2 petals off...
 step 3 - roll the edges under with something narrow...
 step 4 - close the gaps by sticking one petal to another - see the X; but also roll and secure the 2petals and the 1 petal you removed...
 step 5 - they should look like this - just place then inside each other...
I added a Flourish with a Bling in the centre:

Now for the Easel card:
I cut a strip of c/s and folded at the points you see in the pic below
 Only put tape on the bottom half of the front of the card
 and decided it was too plain and needed some bling so lifted off the label and added some then put the label back down!
 Stick the rose to the inside of the card with some excess bling and that becomes the stopping object to keep the easel up!
And of course don't forget a matching envelope!!

Thanks for stopping by - and I hope you are inspired to create an easel card too!