Background

Showing posts with label Manor House Creations. Show all posts

Friday, May 31, 2013

I am Me.

My Latest Layout - My last for FWAB :-(


Another purple layout but quite appropriate since the subject had to be me!! I have used the Jasmine Laser Flourish as a mask (i peeled of as much of the sticky backing as I could or it would tear my page) and inked with distress inks to create my background.

I used a gorgeous new pre-decorated bottlecap from My2Angels for my 'date' - I just added the year with a bit of glossy accents over it to tie it all in (as you know I'm trying to journal and date on my layouts now!)
The border is actually Sawyer's Place Ophelia Script Washi Tape put through my bigshot with a memory box die - Pepita Border #98256.  I am somewhat addicted to putting my washi through my bigshot now!  I recently discovered these dies and am in love!

Ingredients:
White Cardstock
Ranger/Tim Holtz Distress ink - Dusty Concord
Flourish With  A Bling - Jasmine Laser Flourish (used as a mask)
Flourish With A Bling - Purple Pearls
Flourish With  A Bling - Jasmine Laser Flourish - Silver
Flourish With  A Bling - Jasmine Puffy Flourish - Purple
Flourish With  A Bling - Jessie Laser Flourish - Black
Flourish With A Bling - Elise Flouish Silver
My2Angels - Date bottle cap from Floral Charming Dates
My2Angels - Charming Bouquet Purple and Silver
My2Angels - Sparkling Flower Center from Mauve and Silver Charming Chain
ManorHouse Creations Purple Large Flower
Memory Box Die - Pepita Border # 98256
Memory Box Die - Ringed buckle #98186
Tsukineko Stazon Ink - Black
Patterned paper from ? for the Ringed Buckle
Miscellaneous Rub ons
Miscellaneous dark Purple flowers
Miscellaneous White ribbon in a bow

Thanks for stopping by!!
Jen
:-)

Saturday, May 18, 2013

Pink Hanger OTP and 18% discount!

I had a lot of fun creating this Project.  I have just found this draft with the images but no details.  There is a lot of product here but I can tell you most is available from My2Angels.

The best news is that until midnight Sunday (that's tomorrow night!) you can get 18% discount by noting "BIRTHDAY" as the code through the checkout!!!   Spoil yourself, get a bargain, and don't forget to check out Tracy's handmade charming chains, dates, and embellishments!!


Sunday, April 28, 2013

The Ant's Pants!

I have often stuck patterned paper to double sided Jac paper to turn it into a sticker and then put it through my Bigshot and onto my projects.  I didn't have to for this cute card!!

The ants are a new Sticky Paper from Sawyer's Place - I've reviewed the Sticky Paper previously Here.  It comes in A4 (there are 6 designs available so far), and as soon as I saw the ants I knew the card I had to create - I love this saying, and "you're the bees knees" as well!!

News Flash:
Sawyer's Place Sticky Paper is ON SALE at the moment for $4.00 for 2 sheets!!!!
Go and grab a bargain, and while you're there stock up on some Washi Tape too!!


The close-up shows how perfectly and smoothly 'finished' this paper is.

Ingredients:
Twiddleybitz 13cm square Card and Envelope - Black
White Cardstock
Sawyer's Place Sticky Paper  - Bianca Picnic Ants
Sawyer's Place Washi Tape - Pink (from the Bianca Floral 3pk)
Sawyer's Place Washi Tape - White
Die-namics - Perfect Bracket Edge
ManorHouse Creations Flower - Jubilee Princess Pink
Flourish With A Bling - Kate's Corner, Black
Stix2Anything - Adhesives
Smash Dymo Labeller

Thanks for stopping by today - don't forget to grab a bargain at Sawyer's Place, and come back soon (this afternoon) for another Tip/technique Post!
Jen
:-)

Friday, April 26, 2013

Happy Birthday - Nikita

A certain young man has his very first girlfriend and it was her birthday yesterday.  I made this card for him to give to her today.  Blue is a favourite colour, so I went with White, Blue (Teal) and Silver as the colour scheme.

The close-up shows theTeal Cromwell Washi Tape fits beautifully centred on the Silver Washi Tape:
I also trimmed the top and bottom off some spare Teal Cromwell Washi Tape to get a lovely thin strip to edge the silver...

Ingredients:
Sawyer's Place Washi Tape - Cromwell in Teal!!
Sawyer's Place Washi Tape - Limited Edition Silver
White Cardstock
Alison Ellis Design - Silver Rose A4 Patterned Paper
ManorHouse Creations - Winters Song: Embers Flower
Stix2Anything Silicone Adhesive and Double Sided Tape
Miscellaneous Silver Envelope
Inside Greeting: Hero Arts Birthday Stamp - using Ranger/Tim Holtz Peacock Feather Distress Ink.

Thank you for stopping by - I hope you feel as inspired by this little card as I do!!
Jen
:-)

Friday, April 5, 2013

Our Newest Family Addition

My first layout of this gorgeous sweetheart...
Isabella Jayde Canfield.  My Cousin Lee Lee's first child.  We seem to have a connection - I am so blessed to have three beautiful children of my own and be able to be part of Isabella's life. :-)

I used a lot of products that have been in my stash for quite some time.  I have no idea who the manufacturers of the doily, paper, or rub-on are.  Of course I added ink... Stazon Black :-)  All adhesives used were by Stix 2 Anything.  I needed to make sure the items are going to adhere and not come off - I am confident Stix2 will do the job :-)


Flourish With A Bling Adhesive Pearls, Twiddleybitz Chipboard Butterflies:

Prima Flowers and Iridescent Pain, Twiddleybitz Chipboard Passionfruit flower:


Twiddleybitz Chipboard Oriental Border:


Thanks for stopping by
Jen
:-)

Friday, December 28, 2012

Happy Birthday...

I made this card recently for a friend whose favourite colour is blue :-)

  1. I die cut the tag shape from a piece of card so I could use the negative as a stencil and graduated the three distress ink colours using the sponging method.  
  2. I then sprayed the Manorhouse flowers with blue colour spray to deepen the colour
  3. I stamped the happy birthday greeting in midnight blue stazon
  4. While the flowers dried, I stamped the envelope, sponged it, and dragged the stazon inkpad around the edges of the envelope and card for definition.  
  5. I stamped inside the card with another birthday greeting
  6. Then attached the flowers with hot glue.

Ingredients:
Twiddleybitz - White C6 Card
Manorhouse Creations - blue flowers
Tim Holtz Distress ink -
Stazon Ink - Midnight
Die Cut Shape -
Miscellaneous happy Birthday Greeting
Stamp It greeting - Happy Birthday (inside the card)

TFL - Mwah! XXX
Jen

Monday, December 10, 2012

Santa's Mailbox

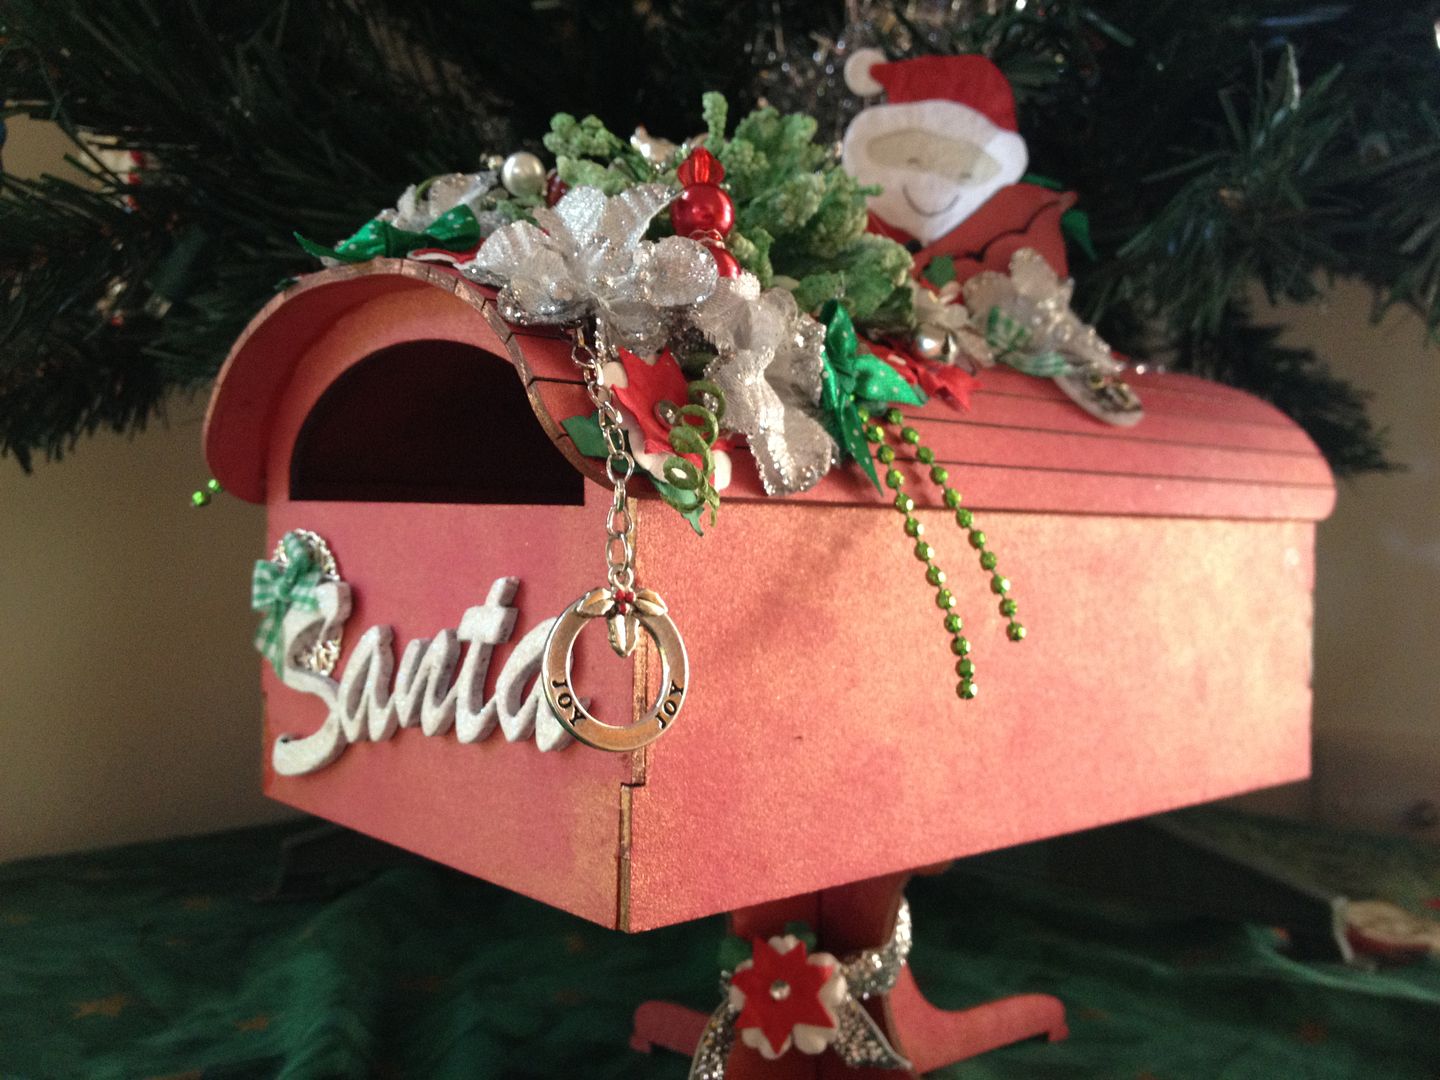
When I saw these new mailboxes from Twiddleybitz I just had to have one right away!  I started on it the second night I had it and colour-sprayed it first thing! Unfortunately I had to put it (and creating in general) aside for a while but I finally managed to finish it the other night.  I am quite please with how it turned out.. I got to use some of my favourite products and I love that I stuck to traditional red and green for Christmas.
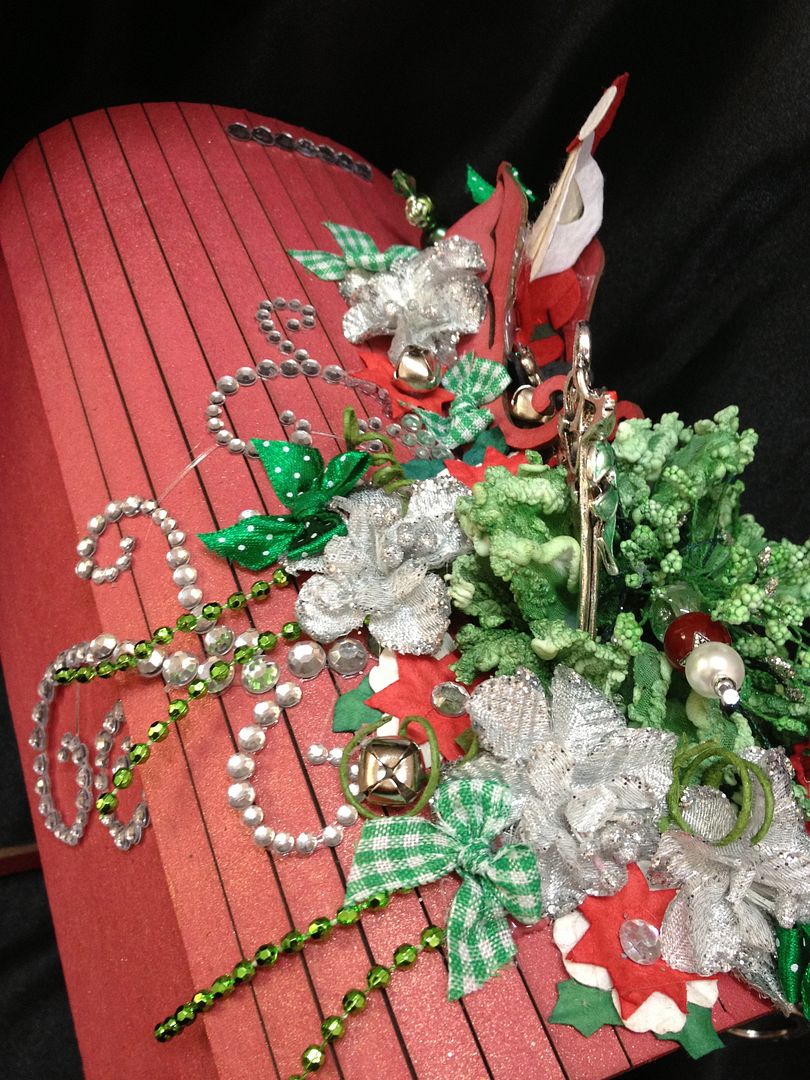
I followed the instructions sheet that was included to assemble and started gathering flowers and embellishments to decorate the top.  I started with the gorgeous Elise Flourish:
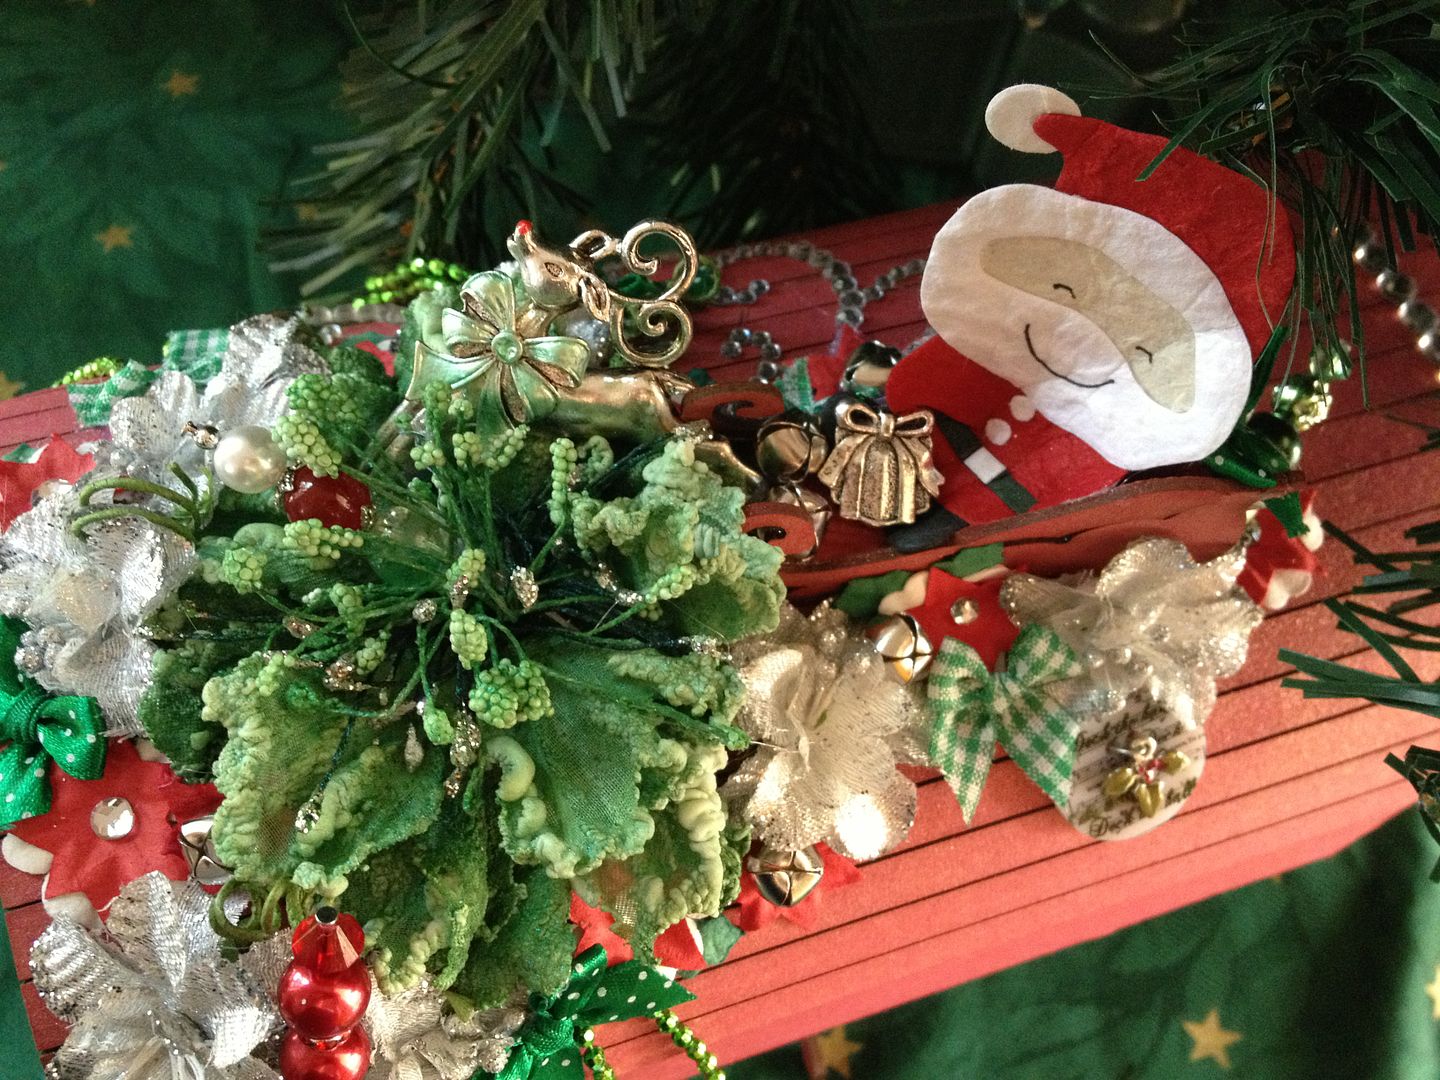
I made the small Twiddleybitz sleigh - added Santa and made Rudolph a bit fancy with my liquid pearls. I sprayed the Manorhouse Creations flower with the green colour spray from the halloween Lindy's Starburst pack:
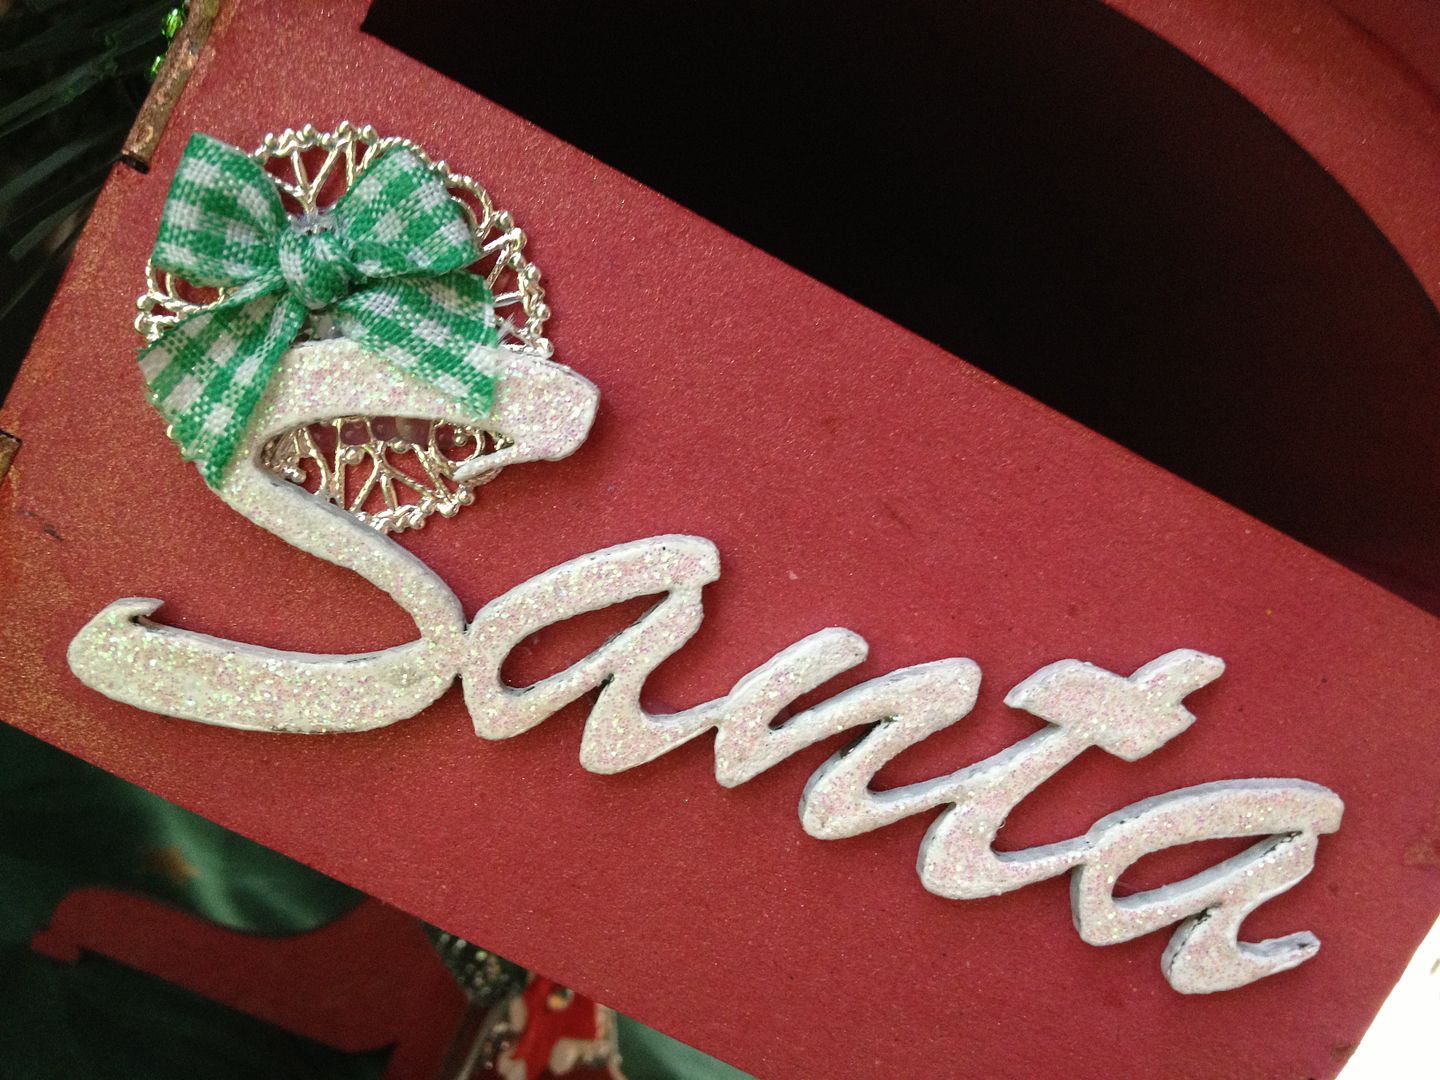
I covered the "Santa" with White Opals embossing enamels and completely covered in kindy glitz, it took a while to dry - then attached it with the embellishments from My2Angels.
Then I tied some matching ribbon around the stand and added a leftover flower.

Ingredients:
Twiddleybitz - Mail box Kit
Twiddleybitz - Santa word
Tattered Angels Glimmer Mist - Red nosed Reindeer
Lindy's Starburst - Freaky franken-lime
Manorhouse Creations - Winter Song - Log Cabin (lrg green flower)
Manorhouse Creations - small silver flowers
Flourish With a Bling - Elise Clear Rhinestone Flourish
Flourish With a Bling - Clear Rhinestones
Crochet By Kim - beaded pins - (Christmas set of 3)
My2Angels - all charms
My2Angels - all bows
My2Angels - all ribbon
My2Angels - all mini bells
My2Angels - Rudolf
Ranger - liquid pearls, ruby red and mint green
Pipe DreamINK - opals, snowgum
Matisse Derivan - Kindy Glitz, christalina
Green Tara - Santa die cut
I also used PVA by Stix2Anything to assemble the sleigh and mailbox.

I hope you like our new mailbox for our Letters to Santa!
Thanks for stopping by -
Jen
:-)

Monday, November 12, 2012

Bedside Brick Lamp

Erin has decided she wants to change her bedroom from pink to blue coloured... so out goes the netting curtain, the pink bed spread, and the pink glitter lava lamp.  All the blue furnishings I can find are predominantly boyish so we're having a bit of trouble.  When she burnt herself on the lava lamp the other night It gave me the swift kick I needed to make her a girly lamp for her room.

I bought a hollow glass brick from Bunnings for $5 (like the ones you used to see in the Dr Surgeries as   a kid) and I painted around the edges in Sailboat Blue Alcohol ink, then when dry I adhered white lace around the edges over the blue.  I then stamped the butterfly and the verse in Midnight Blue Stazon Ink.  Adding the beautiful Flourishes was next... then adding a heap of the gorgeous Manorhouse Creations flowers!!
I jazzed up some of the flowers, and the butterfly wings with iridescent medium and added a little butterfly charm to one of the flowers too.
I have recently discover IKEA (I know slow on the uptake but OMG!) and they have LED strip lighting! I bought this one for $20 and one panel is just too long... I cannot cut it down so already have an alternate use for it...  I am contemplating drilling a hole in the corner of the brick and putting fairy lights inside instead!

I'm really pleased with how this turned out - and the best part is that Erin had no idea!! When I showed her and then told her it was for her room - she nearly cried! She loves it so much :-)

Ingredients:
Glass brick - Bunnings
Ranger Alcohol Ink - Sailboat Blue
Green Tara - very wide white lace
Stazon Ink - Midnight Blue
Miscellaneous Stamp - All things
Bevy of Butterflies Stamp - UK413A by Lisa Hetrick
Flourish With A Bling - Chloe Pearls - Baby Blue
Flourish With A Bling - Chloe Pearls -Blue
Manorhouse Creations - Country Lane raindrop
Manorhouse Creations - Fairy Floss, soft blue
Manorhouse Creations - Silver Capri
Manorhouse Creations - Royalty Duchess Mix (blue with ribbon)
Windsor and Newton Iridescent Medium
My2angels - silver butterfly charm
IKEA - LED strip light.

Thanks for visiting!
Jen
:-)

Thursday, November 8, 2012

MHC Guest Design Team Member!!

I am so excited to be able tell you - I'm the current Guest Designer at Manorhouse Creations!!!

Manorhouse Creations supply beautiful flowers and blooms in almost every style and colour and have just brought out some BRAND NEW small Flowers - especially for Card-makers!!!

I have loved MHC from the moment I laid eyes on them and am completely honoured to be a guest designer.  I have so much fun with these gorgeous products - I hope you enjoy seeing my creations as much as I enjoy creating them!  Thank you again for this opportunity to share with you!

My work featuring MHC products can be seen:

My most recent creation (the blue flower glass brick lamp)
is only on the Manorhouse Creations Blog at the moment, but I will be publishing a tutorial for it in the next day or so :-)

And some more good news - Studio JenJen classes will regularly feature MHC products and a small number will be available for purchase.

Thanks for sharing in my happy news
Jen
:-)

Saturday, October 6, 2012

Tea Party Step Card

I decided to make another Step Card.  I love the depth these cards give to the greeting and/or occasion.
And from another angle....


How I did it - 
1.  I started by adhering my card base to the template I made:
2.  Then I turned it over and used a bone scorer on the (horizontal) fold lines:
3.  I used a craft knife on the two (vertical) cut lines:
 4.  I removed it from the template, and folded along the fold lines:
5.  I then made inserts for the 3 panels - .5cm smaller than the area so there was a .25cm border
6.  Inked all pieces, all the way around - including the card:
7.  I attached them to the front of the card and painted and decorated my chippy:
 8.  I inked the outer edges of the embellishments, worked out the placement, and adhered them:
 9.  And Wallah!!! all finished!

Ingredients:
Twiddleybitz Pre-cut Card stock - cream shimmer
Twiddleybitz - Tea Party Word (WOR067)
Twiddleybitz - Teapot & Cups (TEA001)
Kaisercrafr - Patterned Paper: The Lake House
Flourish With A Bling - Pearls, Copper
My2Angels - Mini Rose Buds, white
Manorhouse Creations - Petite Roses, Marshmellow (MHCpetimars)
Matisee Derivan - Kindy Glitz, clear
Range/Tim Holtz - Distress Ink, Antique Linen
Range/Tim Holtz - Distress Ink, Brushed Corduroy
Range/Tim Holtz - Distress Crackle Paint, Tattered Rose
Stix2Anything - Double-sided Tape

Thanks for joining me today - if you'd like to make cards like this - I will be teaching it in a class in November - we are doing Christmas ones!!  All materials will be included and a template and instructions for you to also take home.  Another exciting development is for those interstate/country, I will putting together a pack for purchase that includes video instruction!!

Please make sure you're following my blog for the details :-)

Jen
:-)


Wednesday, September 19, 2012

Cards ScrapCake Pair

I made these cards while on a Scrapbooking Retreat in New Zealand.  I had bought the beautiful papers from Nerrida at Manor House Creations when I was at the Melbourne Paperific Expo the week before... They are from the Sweet Childhood 6x6 paper pad and the die-cut set.

And closer:

The second card -
And closer:
Ingredients:
Twiddleybitz Square Card - White
The ScrapCake 6x6 Paper Pad - Sweet Childhood
The ScrapCake Die Cut Set - Sweet Childhood
Flourish With A Bling - Copper Grace Pearl Flourish
Manor House Creations - Large Flower - (If you can name it, please let me know :-))
My2Angels - Small White Roses
Ranger/Tim Holtz - Distress Ink - Victorian Velvet
Martha Stewart - Butterfly Punch (top card only)
Stix2Anything - Double-sided Tape

Thanks for stopping by!
Jen
:-)

Sunday, September 16, 2012

My Little Choir Girl

I did this layout at the Vintage Indulgence retreat in New Zealand recently.  I had a fabulous weekend teaching a make n take and spending time with my online buddies.  I really feel like I've cemented some friendships that were 'meant to be'.  

My journaling is the tag in the top left hand corner as I am determined to not only create beautiful layouts I am happy with, but to journal and not forget why I started scrapbooking in the first place - to preserve our memories and tell a story!!  This photo is of Erin ready to perform in the school choir - she loves it and I am so happy that we share a love of singing and music!

  • The background was stamped with the butterfly stamp in black stazon, then the butterflies colours with white resist crayon.
  • I then sprayed the page with Banshee Black starbust (and the doily) and edged with black soot distress ink.
  • I added the patterned paper (edged too!) and the doily
  • I coloured the chippy frame with black stazon and when dry, added the silver rhinestones
  • added some strips of washi (not wasabi LOL) tape
  • I added the photo, frame and the manorhouse creations rosettes
  • attached the charm from My2Angels
  • Placed the white Grace flourishes
  • slid the tag for my hidden journaling in at the top of the rosettes under the frame...
  • and finished by adding just a touch of the irridescent medium to the rosettes
And the customary close-up :-)
Ingredients:
White Cardstock
Alison Ellis Design Patterned Paper
Twiddleybitz - Fantasy Round Overlay (OVO10)
Flourish With a Bling - Silver Rhinestones
Flourish With a Bling - Grace Pearl Flourish, Pearl
Manor House Creations - Rosettes, Pearl (SAF0037pea)
Kaiser Stamp - Botanical (CS795)
My2Angels - handmade embellishment with XOXO charm
My2Angels - premade white bow with silver edges
Doily
Washi Tape - Music
Wax Resist Crayon
Stazon Ink - Black
Tim Holtz - Black Soot Distress Ink
Lindy's Stamp Gang - starburst - Screaming Banshee Black
Windsor & Newton Watercolour Irridescent Medium (Thanks Janine Koczwara for the intro to this awesome medium!!)
Stix2Anything - Double-sided Tape

Thanks for stopping by!
Jen
:-)

Monday, September 3, 2012

Gold Powder Frame

I made this little frame while product testing for Twiddleybitz...


Twiddleybitz Metallic Powders
Recently I was very lucky to get my hands on these very new metallic powders, I couldn’t wait to have a play and discover ways to add that bit of sparkle to my projects!  The first thing I did was use the Binding Solution that accompanies the powders and this is by far the easiest and best medium I used.  It gives a beautiful finish and is easy to use.  
  • The binding solution, multi-medium gloss, glossy and crackle accents all had no rub off as the powders were suspended in the medium.
  • The Perfect Medium and Versamark ink I brushed the powder on while wet and although I sprayed with water and spray fixative after - disappointingly, there was rub off.
  • Modpodge gave an interesting effect - the powder mixed well but I also noticed an interesting starbust effect when just sprinkled on the top of the wet modpodge.
  • Inks had no binding or holding power for the power at all.
  • Brushing the powders onto double sided tape worked a treat - a lovely concentrated shine.
  • One scoop with the paddle pop stick suspended in a half full minimister had almost no effect when sprayed onto the chippy, but painting it one had a better effect - although a small, acceptable amount of rub off when dry.
  • Various mixes of stazon re-inker and powder were unsuccessful as the powder sits on the surface and the ink soaks in.
  • Mixing the powders with the new xpress-it clear gel and ordinary PVA also were successful - with no rub-off once dry.

Once I was happy with the various ways to mix the powders, I decided to experiment with using them on different surfaces, using different techniques.
  • Painting was the most obvious method, perfect for chipboard - a basic mix of 1 paddle pop stick scoop and approximately 6 drops of solution gave the painted finish you see on the lamp post - smooth, and paint like.  The swirls around the frame were made by increasing the ratio of powder to solution - 2:1, and blotting it on with the brush.
  • The metal butterfly charm was painted with the basic mix and then lightly sanded - there is no rub off or smudging and the gold is so brilliant the bling appears dull in comparison!
  • The large cream flower also was painted by the brush - you notice the thicker areas... The lighter area were actually coloured using a sponge on a handle - similar technique to distress inks on the sponge.  The mix must be done on your non-stick mat though. 2 cap taps onto the sheet with 9 drops of solution, mixed with the sponge and then applied to the flower - the orange flower also has this technique.
  • The Carriage has a different finish to the lamp post - it was also sponged.  This was very quick to completely cover.  The powder and binding solution mixture is quick drying - another thing I like about it!
  • I also used the sponge to apply the mix to the lace you see in the background and to sponge around the edges of the stamped greeting. Again the same sponging technique was used on the “explore” tickets.
  • The mixture is also fabulous for using on tumbled glass as you can see from the pendant, AND once dry you can stamp on the surface with permanent ink!
I found the accompanying binding solution was the easiest product to use the powders with.  The mixture allows for application to a variety of surfaces and is fast drying.   This is a product I would buy and use; if only there were more colours were available!

I hope you have learnt something new as I certainly did!
Thanks for stopping by!
Jen


Sunday, August 26, 2012

Thank you... my son

I just love this photo of Cameron, makes me all teary and soppy inside!!  The perfect layout for how I feel...

This layout was created for a collaboration between two top Australian Companies - Twiddleybitz, and Manorhouse Creations.  MHC Flowers are great to work with and compliment so many styles - and i hope this layout puts an end to any rumours you've heard that "you can't use flowers on a boy layout - especially for older boys"!
And some close-ups:

  • The splats were made by using the distress stain like a bingo dabber - just 'splat' with the dabber when the end is soaked well :-)
  • I also "splatted" on my non-stick craft mat and then dragged the scrunched up flowers through the splats to colour them :-)
Here's my video tutorial for "How To Splat"!

And the close-up...
Ingredients:
Twiddleybitz - Small Decorative Frame (FRA015)
Twiddleybitz - Twiddleygroove Alphabet Black (ALPHA001T)
Twiddleybitz - Bag of Love (BAS013) - Hearts
Twiddleybitz - Fine Fern Leaves Assorted (FER002)
Twiddleybitz - Fence set of 4 (BAS014)
Manorhouse Creations - Solitude White (3097solitude)
Manorhouse Creations - Imagine Burgundy (3111imagburg)
Manorhouse Creations - Idealic Cornflour (3098idcorn)
Flourish With A Bling -  Jasmine Black Puffy (16066)
Flourish With A Bling - Chloe Antique Gold (16212)
Cardstock - White
Tim Holtz Distress Stain - Faded Jeans
Tim Holtz Distress Stain - Vintage Photo
Stazon Ink - Jet black
Stampin' Up! - Thank you stamp
Dymo Labeller

Thanks for stopping by - I do hope you'll follow one of the links above to check out these gorgeous products!
Jen
:-)