Background

Showing posts with label Matisse Derivan. Show all posts

Monday, December 10, 2012

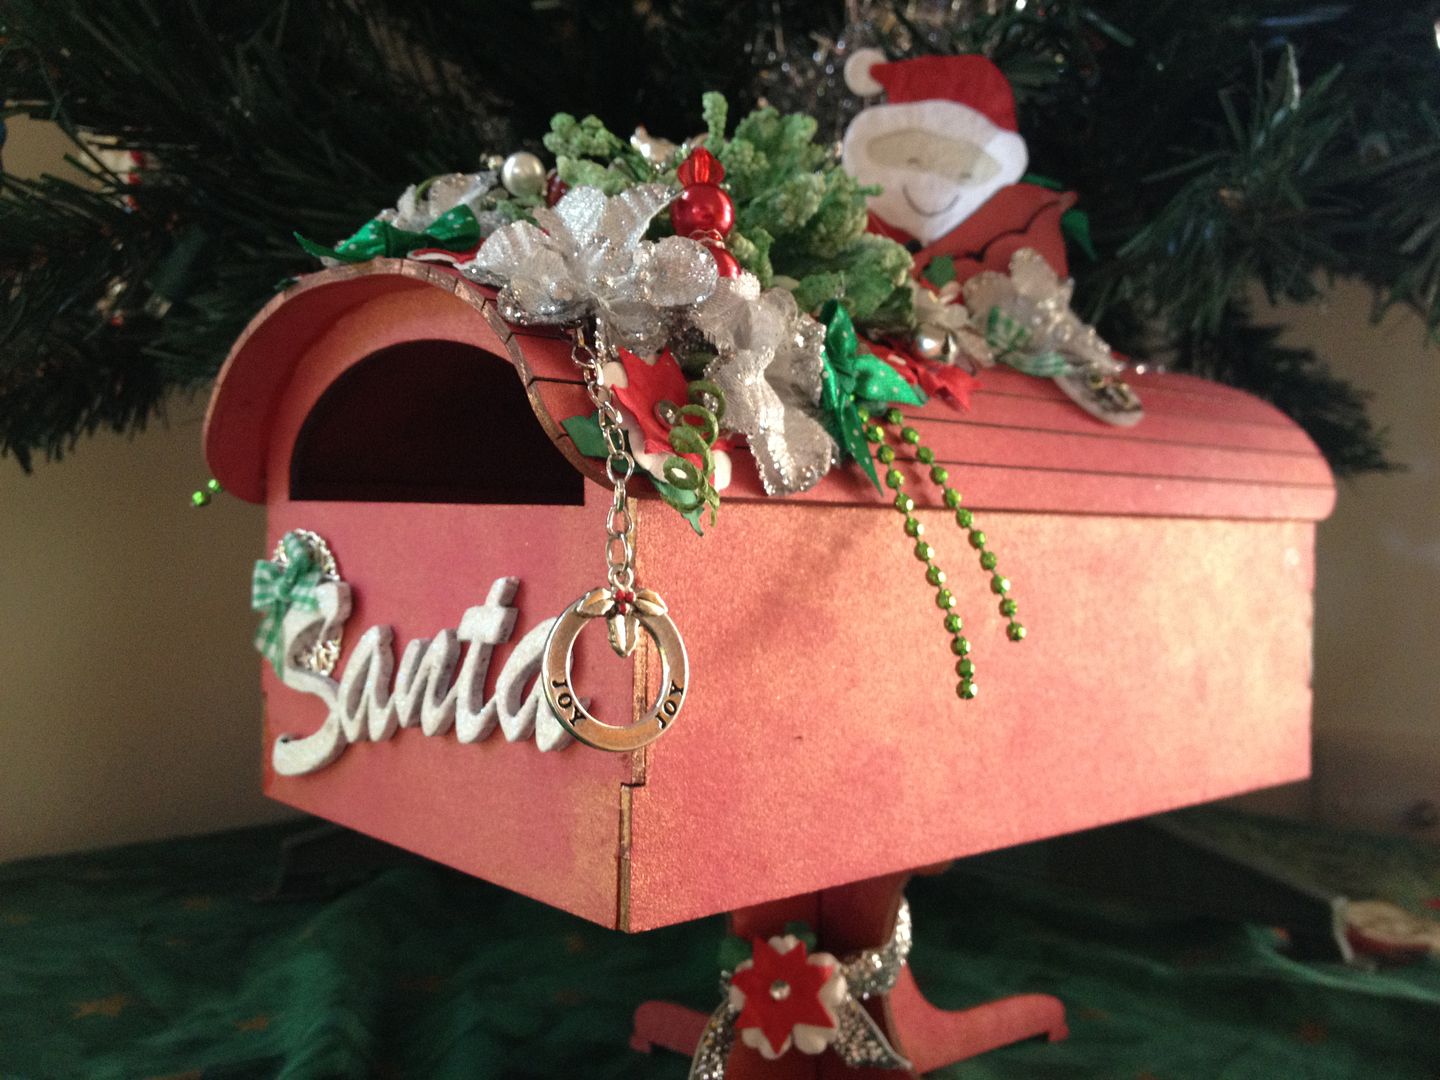
Santa's Mailbox

When I saw these new mailboxes from Twiddleybitz I just had to have one right away!  I started on it the second night I had it and colour-sprayed it first thing! Unfortunately I had to put it (and creating in general) aside for a while but I finally managed to finish it the other night.  I am quite please with how it turned out.. I got to use some of my favourite products and I love that I stuck to traditional red and green for Christmas.
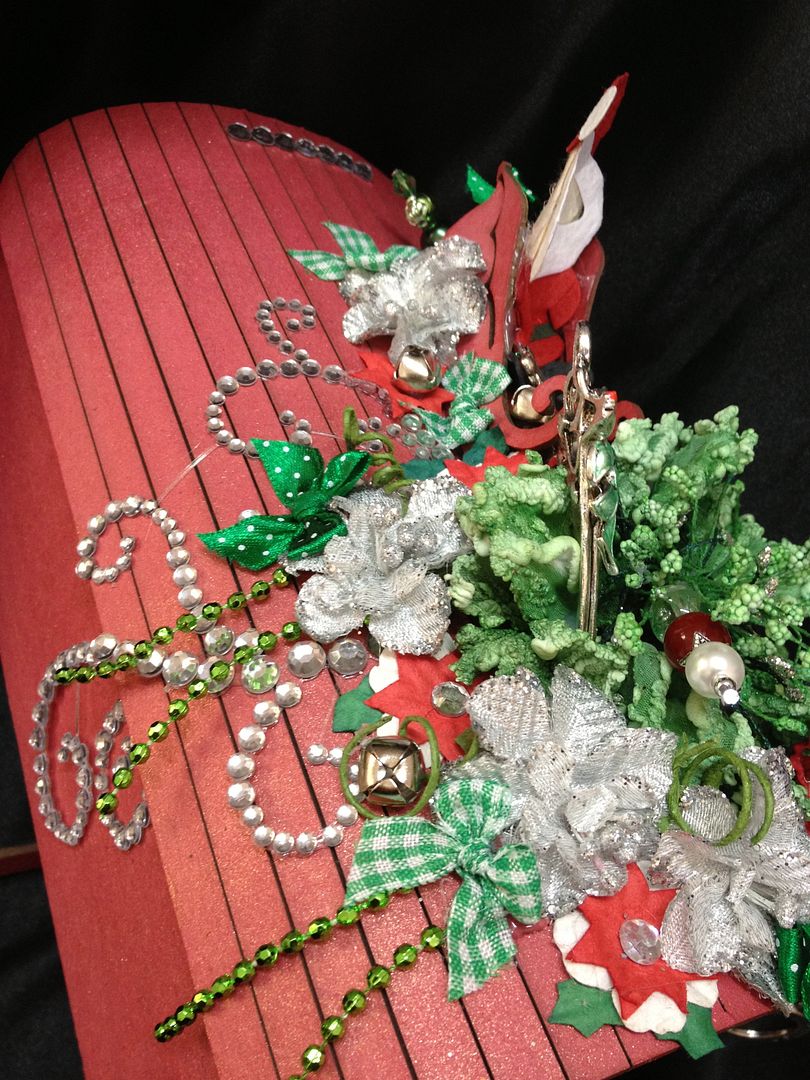
I followed the instructions sheet that was included to assemble and started gathering flowers and embellishments to decorate the top.  I started with the gorgeous Elise Flourish:
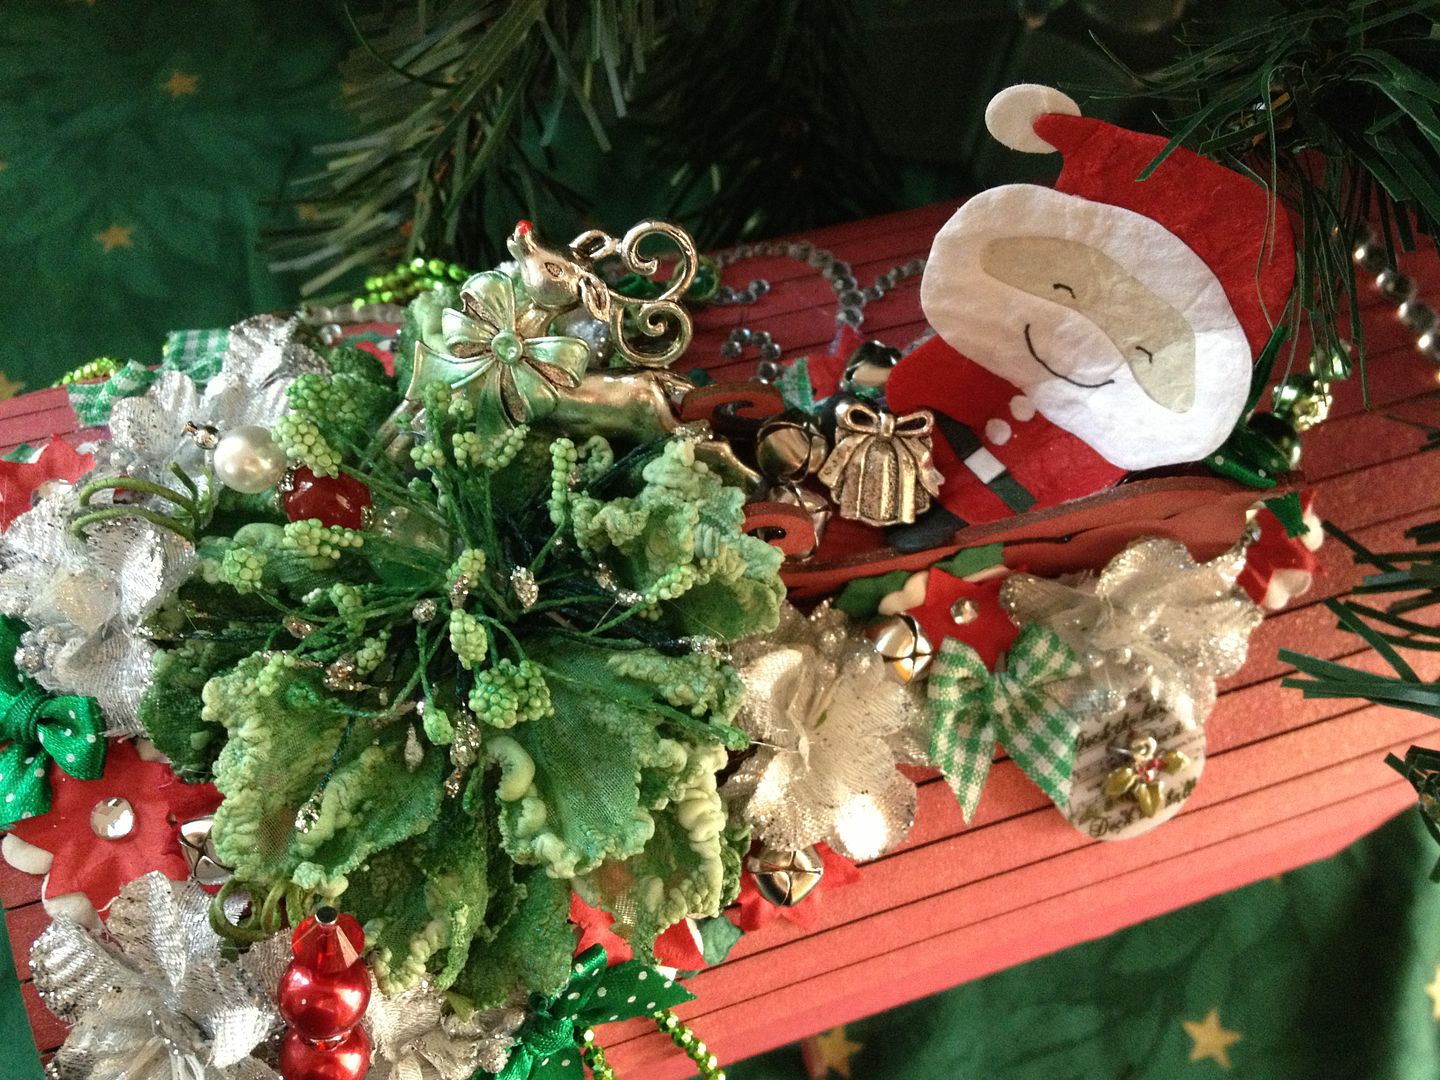
I made the small Twiddleybitz sleigh - added Santa and made Rudolph a bit fancy with my liquid pearls. I sprayed the Manorhouse Creations flower with the green colour spray from the halloween Lindy's Starburst pack:
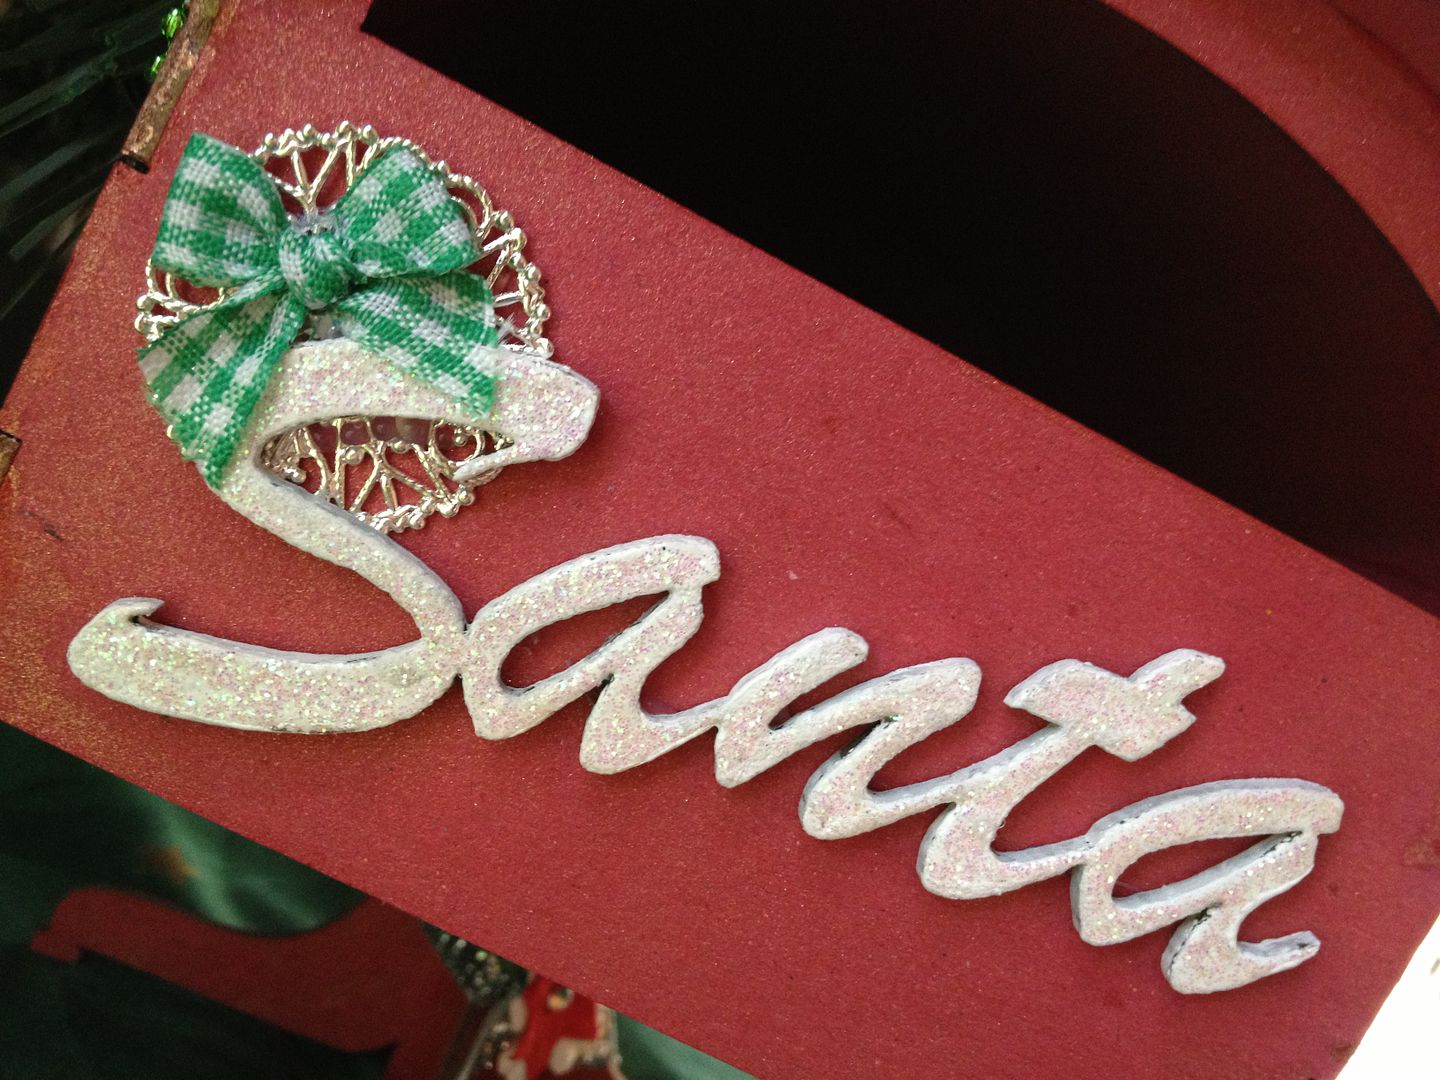
I covered the "Santa" with White Opals embossing enamels and completely covered in kindy glitz, it took a while to dry - then attached it with the embellishments from My2Angels.
Then I tied some matching ribbon around the stand and added a leftover flower.

Ingredients:
Twiddleybitz - Mail box Kit
Twiddleybitz - Santa word
Tattered Angels Glimmer Mist - Red nosed Reindeer
Lindy's Starburst - Freaky franken-lime
Manorhouse Creations - Winter Song - Log Cabin (lrg green flower)
Manorhouse Creations - small silver flowers
Flourish With a Bling - Elise Clear Rhinestone Flourish
Flourish With a Bling - Clear Rhinestones
Crochet By Kim - beaded pins - (Christmas set of 3)
My2Angels - all charms
My2Angels - all bows
My2Angels - all ribbon
My2Angels - all mini bells
My2Angels - Rudolf
Ranger - liquid pearls, ruby red and mint green
Pipe DreamINK - opals, snowgum
Matisse Derivan - Kindy Glitz, christalina
Green Tara - Santa die cut
I also used PVA by Stix2Anything to assemble the sleigh and mailbox.

I hope you like our new mailbox for our Letters to Santa!
Thanks for stopping by -
Jen
:-)

Sunday, December 9, 2012

Lennox

For a beautiful bouncing little boy whom arrived on Saturday.

Ingredients:
Bazzil Cardstock
Stazon black ink
Twiddleybitz - Itty Bitty Alpha in pink - coloured black with stazon
Twiddleybitz - Baby Bunting (BOR028)
Flourish With A Bling - Adhesive Rhinestones - Antique Brown
Ranger/Tim Holtz - crackle paint
Ranger - Liquid Pearls (onyx)
Matisse Derivan - Kindy Glitz
Foam Tape from Stix2Anything
Assorted Ribbon

Thanks for stopping by!!
Jen
:-)

Saturday, October 6, 2012

Tea Party Step Card

I decided to make another Step Card.  I love the depth these cards give to the greeting and/or occasion.
And from another angle....


How I did it - 
1.  I started by adhering my card base to the template I made:
2.  Then I turned it over and used a bone scorer on the (horizontal) fold lines:
3.  I used a craft knife on the two (vertical) cut lines:
 4.  I removed it from the template, and folded along the fold lines:
5.  I then made inserts for the 3 panels - .5cm smaller than the area so there was a .25cm border
6.  Inked all pieces, all the way around - including the card:
7.  I attached them to the front of the card and painted and decorated my chippy:
 8.  I inked the outer edges of the embellishments, worked out the placement, and adhered them:
 9.  And Wallah!!! all finished!

Ingredients:
Twiddleybitz Pre-cut Card stock - cream shimmer
Twiddleybitz - Tea Party Word (WOR067)
Twiddleybitz - Teapot & Cups (TEA001)
Kaisercrafr - Patterned Paper: The Lake House
Flourish With A Bling - Pearls, Copper
My2Angels - Mini Rose Buds, white
Manorhouse Creations - Petite Roses, Marshmellow (MHCpetimars)
Matisee Derivan - Kindy Glitz, clear
Range/Tim Holtz - Distress Ink, Antique Linen
Range/Tim Holtz - Distress Ink, Brushed Corduroy
Range/Tim Holtz - Distress Crackle Paint, Tattered Rose
Stix2Anything - Double-sided Tape

Thanks for joining me today - if you'd like to make cards like this - I will be teaching it in a class in November - we are doing Christmas ones!!  All materials will be included and a template and instructions for you to also take home.  Another exciting development is for those interstate/country, I will putting together a pack for purchase that includes video instruction!!

Please make sure you're following my blog for the details :-)

Jen
:-)


Sunday, August 26, 2012

Erin's Amazing Birthday Race...

I had such fun creating a game that was different for Erin's Birthday.  The theme for the party was blue.
The invite:


And the game:  I had all the clues and they had to complete the challenge - have a photo taken to confirm it, then come and get their next clue from me!


The first clue was hidden inside the polka-dot balloons, they had to pop it to get it out
Ian buried the two treasure boxes and made some fake holes to confuse them (heheee) - it worked!!!
This is one of the favourite challenges - they had to make a marshmallow pop - and NOT eat it yet (a couple of them bit them and then realised!
Teams of 5 meant at least 1 person had to paint their toes...
they loved this
Funny they didn't read the clue properly for this one - I had to send them back for blue pegs only!!
It's amazing how quickly kids can sign their name in chalk!
The grass had recently been mown so too easy to find.... perhaps mix colours next time or put names on them and they find their own?
Dad was the photographer and got yelled at each time they finished a challenge as they couldn't get their next slue until he had a photo of them, it was hilarious - he had no idea where to be - just came when they yelled finished!!
 And the pinata was actually a 'stuffaloon' but it burst in the car on the way to the park so Matthew and Mum rushed down to the 2 shop and bought this blue cupcake and Matt stuffed everything in there instead!  the kids loved it, the winning team got to bash it first and they actually got it open really quickly!  Riley bashed it so hard it burst and broke off the hanger and the kids swamped him - he ended up with a grazed knee but was happy as he got the most from it! :-)

Feel free to create your own Amazing Birthday race and adapt to your kids' likes and age... let me know if you do or you want help.  The rhyming of the clues is easier than you think!

Thanks for stopping by
Jen
:-)

Friday, August 24, 2012

Cog-flower Buttonierre

Some time ago i set myself the challenge of making flowers with chipboard cogs... a few failures but then success!!!  I love making these - they're a little fiddley but i think they look great :-)
and a little closer...

These are made from the Tab Cogs available through Twiddleybitz - TABCOG001.
  • I cut out the centres and discarded them.
  • I sprayed the ring with colourspray and while still wet, rolled them like rolled flowers.
  • I then put a blob of hot glue (about the size of a 10c piece) on my craft matt.
  • I pressed my rolled rose into it and let it cool.
  • I then carefully peeled it from the craft sheet and trimmed any excess glue.
  • I then inked, or sprayed until I got the desired colour and let dry completely.
Then came the adding of the floristry wire and tape to make this spray.... Be warned - the tape is tacky on both sides and you end up quite "stuck up"!!

Ingredients:
Twiddleybitz - Tab Cogs (TABCOG001)
Colourspray/Glimmer Mist
Matisse Derivan - Kindy Glitz (Red)
Floristry Wire and tape
My2Angels - Rose leaves, two-tone.

** If you'd like to see these "In the flesh" visit Twiddleybitz at Paperific at the Melbourne Showgrounds next weekend (Aug 31 - 02 Sept) as Nic and Andrew will be wearing them!

Looks and sounds quick and simple but they were actually quite fiddley!!!
Thanks for stopping by!
Jen
:-)

Saturday, August 11, 2012

Baby Girl Card+

The gift of the Baby Girl Nightlite I made the other day wouldn't be complete without a matching card so I made this one :-)  Although my Cousin and I rarely talk these days (and I'm really upset, she doesn't have time for me!) I love her to bits and am really excited for her and her fiance. I can't wait to meet their little munchkin.  I hope she knows she can come to me at any time for help, advice, or just a bit of non-judgemental company!

The gorgeous Manorhouse Creations Petit Marshmallow Roses with a smidgeon of clear Kindy Glitz...

I do like it on the card but the great thing is you can take the doily off the card and frame it for a room decoration - or adhere a skewer and put it in a vase of flowers or the like...

Ingredients:
Twiddleybitz - Square Card and Envelope Pack - White
Twiddleybitz - Circle Doily Frame (FRA019)
Twiddleybitz - Baby Basics (BAB001) - feet and bib
Manorhouse Creations - Jubilee Princess Pink (SAF0006prin)
Manorhouse Creations - Petit Roses Marshmellow (MHCPetimars)
Matisse Derivan Kindy Glitz - Clear
My2Angels Charms - Teddy Bears
My2Angels Charms - Babies Pram
Flourish With A Bling - Pearls - Pink
Tim Holtz Distress Ink - Spun Sugar
Marvy Le Plume Marker - no94 Scarlet
Brilliance Moonlight White Archival Inkpad
Papercraft Clear Cling Stamps - Baby
Ranger Perfect Pearls Powder - Pink Gumball
Miscellaneous Paper Doily, and pink feet ribbon
Stix2Anything - Double-sided Tape

Thanks for stopping by
Jen
:-)http://twiddleybitz.com.au/products/3142-bab001.aspx