Background

Showing posts with label Class. Show all posts

Saturday, October 6, 2012

Some Birdy Loves You

Yep - another Step Card :-)

I saw this daisy paper in a 6x6 paper pad by Prima and loved it - so the whole card evolved around this sheet of patterned paper!!
 And from another angle:
This time I made the front panel into two separate sections - one along the bottom and one in the centre - the square.
 And a close-up of my cute little birdie:

Measurements (in cm's) for mats are:
1 x 2.5x14
2 x 2.5x6.5
1 x 7x8

Measurements (in cm's) for patterned paper are:
1 x 2x13.5
2 x 2x6
1 x 6.5x7.5


Ingredients:
Twiddleybitz Pre-cut Card stock - cream shimmer
Twiddleybitz - Ornate Circle Frame (FRA013)
Twiddleybitz - Whimsy Flower Elements (WBE005)
Prima - Patterned Paper - Meadow Lark
Flourish With A Bling - Pearls, Pewter
Ranger/Tim Holtz - Distress Ink, Brushed Corduroy
Ranger/Tim Holtz - Distress Crackle Paint, scattered straw
Ranger Liquid Pearls - Avocado (to colour the leaves on the daisy in the pot)
Adirondack Acrylic Paint Dabber - Snow Cap
Stazon Ink - Olive Green
My Pink Stamper Acrylic Stamp - Tweetie Hoo Puns
Stix2Anything - Double-sided Tape
Miscellaneous Brown fluffy feathers (from Spotlight i think!)

Thanks for joining me today and don't forget - if you'd like to make cards like this - I will be teaching it in a class in November - we are doing Christmas ones!!  All materials will be included and a template and instructions for you to also take home.  Another exciting development is for those interstate/country, I will putting together a pack for purchase that includes video instruction!!

Please make sure you're following my blog for the details :-)

Tea Party Step Card

I decided to make another Step Card.  I love the depth these cards give to the greeting and/or occasion.
And from another angle....


How I did it - 
1.  I started by adhering my card base to the template I made:
2.  Then I turned it over and used a bone scorer on the (horizontal) fold lines:
3.  I used a craft knife on the two (vertical) cut lines:
 4.  I removed it from the template, and folded along the fold lines:
5.  I then made inserts for the 3 panels - .5cm smaller than the area so there was a .25cm border
6.  Inked all pieces, all the way around - including the card:
7.  I attached them to the front of the card and painted and decorated my chippy:
 8.  I inked the outer edges of the embellishments, worked out the placement, and adhered them:
 9.  And Wallah!!! all finished!

Ingredients:
Twiddleybitz Pre-cut Card stock - cream shimmer
Twiddleybitz - Tea Party Word (WOR067)
Twiddleybitz - Teapot & Cups (TEA001)
Kaisercrafr - Patterned Paper: The Lake House
Flourish With A Bling - Pearls, Copper
My2Angels - Mini Rose Buds, white
Manorhouse Creations - Petite Roses, Marshmellow (MHCpetimars)
Matisee Derivan - Kindy Glitz, clear
Range/Tim Holtz - Distress Ink, Antique Linen
Range/Tim Holtz - Distress Ink, Brushed Corduroy
Range/Tim Holtz - Distress Crackle Paint, Tattered Rose
Stix2Anything - Double-sided Tape

Thanks for joining me today - if you'd like to make cards like this - I will be teaching it in a class in November - we are doing Christmas ones!!  All materials will be included and a template and instructions for you to also take home.  Another exciting development is for those interstate/country, I will putting together a pack for purchase that includes video instruction!!

Please make sure you're following my blog for the details :-)

Jen
:-)


Wednesday, October 3, 2012

Studio Jen Jen - first class!!

 I am teaching in my first ever class at Studio Jen Jen.
I am so excited to start teaching again and from my studio in Coombabah on the Gold Coast!

When - Saturday November 10th, at 10am - 12pm.   $15.00 
You will learn this resist technique, take home 3 finished cards and a number of sample tags.  You will need to bring adhesives, scissors, and a trimmer; all other materials are provided. 


If you are on the Gold Coast (or nearby) or know someone who is, please spread the word!  The more students I get, the more frequently I can hold classes!  I have plans for teaching Twiddleybitz Off The Page projects too - I will hold these classes after the card classes (most likely 12:30pm to 3:30pm).  Please let me know of your interest as soon as possible by message here or email me at scrapjah(at)gmail.com, payments accepted via cash, direct deposit or paypal :-)

The first 3hr class for Off The page is a Christmas Themed ATC Cupboard ($30) 
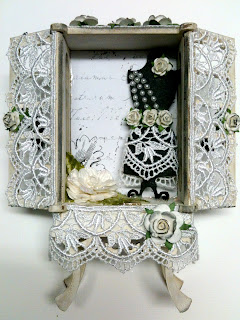
similar to these:

Friday, September 28, 2012

Prima Class...

Layout of Fiona Tupper and I completed in Janine's class at the NZ retreat.  
Thank you Janine Koczwara, I enjoyed using Prima for a change as I've rarely touched it!  
AND I've fallen in love with your iridescent medium!!  Thanks! :-P


Wednesday, August 15, 2012

Yipppeeeee

I am so excited to finally be able to share with you all, that I've been accepted as a member of the Twiddleybitz Design Team and a Product Ambassador for another year!!
I look forward to working with Nic and Andrew again and of course the fabulous Twiddley Angels! Please welcome the rest of the team:


To celebrate I thought I'd look back over the past 18 months or so and pick a few of my favourite Twiddleybitz projects...  Most recently my TopHat and the Lover's Garden, but besides those...

I LOVE this layout and my beautiful boy of course.

These techniques are all me! (unfortunately the photo is too!)

Love how beautiful this one is - made for my mum

My sense of humour is shining through!

A class I taught on the Gold Coast with the fabulous wishing well...

For a friend's grandbaby :-)
Again - these techniques are me to the core...

One of many cards - this one created in the wee hours of the morning during one of the Brisbane shows!

More Brisbane show creations - this a Christmas ATC..

My most favourite stamp ever - stamped into coloured thick embossing enamels...

One of many ATC cupboards...

and another...

and another...

House warming card - made in the hopes I could give it to myself if indeed no13 was to be rented to us!

 One of my all-time favourite cards:

Oh - and ANOTHER ATC cupboard!!

If you've managed to get to the end of this little trip down memory lane... congratulations!!!  I guess you've figured out now I cannot pick just a few, although there are many I did not pick!  I'm sure that it shows just how much I LOVE Twiddleybitz products and how great they are to work with!

Thank you so much for stopping by and taking the time to read my blog and see my creations.  I do hope I have inspired you to create some Twiddleybitz of your own!

Jen
:-)

Monday, August 13, 2012

Almost a Teenager

A little while ago now I attended a class at My2Angels with Tracy Kielty.  I haven't been to a class for so long and as it was a last minute decision - I had nothing with me, no supplies, no photos, nothing - but I was welcomed with open arms!!! The lovely Mazz Cairns was also at the class and willingly let me raid her tools - thanks Mazz ;-P

Tracy is a great teacher and never ceases to amaze me with the wonderful detailed layouts and embellishments she comes up with - she's a lady that's worth knowing and is definitely an asset to my scrapbooks!!

I have had the layout sitting on my desk for a while now and have added a few things (sorry Tracy couldn't resist LOL) - I've added my title in Twiddleybitz Chippy, the hinge, the screwtop brads, the Flourish with a bling.
 And a closeup...

I love that Cameron looks just that bit older - he's not a 'little boy' anymore, even though he'll always be my baby!  My fav bit of this layout was 'splatting' my distress stains - it was insanely difficult not to yell "BINGO" at the top of my voice! PMSL

Ingredients:
Kaiser patterned paper - Attitude
Cardstock
Twiddleybitz Hinge (HIN003)
Twiddleybitz Alphabet - Grunge (GRUN001)
Flourish With A Bling Pearls - Pewter
My2Angels - truck charm
My2Angels - ball and chain
My2Angels - Hardware Brads
Stampendous Aged Embossing Enamel (My2Angels)
Stazon Ink - Black
Staples - Coloured (Thanks Mazz!)
Tim Holtz Distress Daubers - Black soot
Tim Holtz Idea-ology - Reinforcers
Tim Holtz Distresser

Thanks for stopping by - and if you're interested in attending one of the best classes money can buy - visit Tracy HERE at My2Angels!
Jennifer
:-)

Saturday, August 4, 2012

How To Use Your Twiddley Bitz - Part 2 (Technique Tag Ring)

While creating the large technique frame I decided to create a Technique Tag Ring for myself and to teach from my studio at home.  I store the tags on a ring by my work desk in the studio.  Each tag has the technique written on the back in permanent marker:

Here are the tags...


And the techniques are:
Free = Naked Chipboard
Cogs = Naked with Glossy Accents or Diamond Glaze
Flower = Aged and Distressed (sandpaper/craft knife)
Clock = Distress Ink using applicator sponge + through a stencil
Owl = Distress Stain (effect is like a paint wash)
Glitter clock = Glitter and Jac Paper using a stencil

Door & Windows = Acrylic Paint
Cog & Flower = Crackle Paint – Tim Holtz (Ranger), Jo Sonja’s.
Butterfly = Colour Sprays/Glimmer Mist
Brown = Flocking and Hot Set Powder (powdered glue)
Dust = Diamond Dust on Glossy Accents + stencil
Flourish = (with a) Bling

Music = Stamped Stazon on Colourspray
Laced up = Punches!  Any how, any way!
Cog flower = Layered and Rolled
Black & Gold = Stencils – Crafters Workshop etc OR use your Twiddleybitz!
Squiggly Square = Sewing – hand or machine
Mottled = Alcohol Inks and applicator

Bird = Patterned Paper (Graphic 45)
Wood = Ink + Pens + Mod Podge = Wood grain!
Cogs = Cuttlebug Embossing Folder + Stazon ink
Anchor = Regular Embossing Powder (AED)
Flower = Opals or UTEE (Ultra Thick Embossing Enamel) stamped into
Key = Rusting Powder (Mod Podge, Rusting Powder, Vinegar)

Here's another photo taken from an angle - you can really see the detail in the tags this way :-)

If you'd like to come to a class to make your own technique tag ring or would like me to come to your store to teach this as a class - please contact me through this blog or facebook.  I'd be happy to discuss with you.

Thanks for stopping by
Jen
:-)

Friday, March 16, 2012

Hello again!

It feels so blooming awesome to be moved in, connected to the net, and set up in my new studio.  I can't wait to show you the things I did just before moving.

AND Paperific in Melbourne is only 2 weeks away!!!  I received some awesome new papers from Alison Ellis Design yesterday that I can't wait to play with :-)

A couple of things to deal with from the previous property but then I am FREE of crap and stress!  I LOVE living closer to work, the kids love walking home, and playing with their friends in the afternoon, and I love being close to the river again!  I have even started walking every morning!!!!

Thanks for being patient with me during the move - I have some exciting things planned and I can't wait to tell you but we'll have to wait just a little bit longer :-)))

Thanks for dropping by
Jen

Monday, November 21, 2011

Wishing Well...

Here she is in all her glory - love her to bits.  Pink and girly and not usually me, but I think I'm getting used to it :-)


It was a great class.  I had a ball teaching again!  thank you so much to Lynda for having me, and to Penny and Ann-Marie for coming along.
All products were from Lynda's Craft haven - the new shop on the Gold Coast at Merrimac.