Background

Tuesday, June 19, 2012

FWAB + Manor House + Washi = ?

A quickie card tonight - so simple but quite effective :-)
I cannot get over how great these Manor House flowers are... and I had to experiment with my washi tape; and the PERFECT accompaniment - the chloe pink flourishes :-)))))))


And the obligatory close-up :-)

Ingredients:
Black shimmer Card and envelope
Washi Tape
Flourish With A Bling - Chloe Pink Flourish
Manor House Creations - Winters Song - Embers (the pink from the set)

Thanks for stopping by!
Jen

Monday, June 18, 2012

Amanda's Sketch Challenge - FWAB

Over at Flourish With A Bling Amanda Redicliffe  has challenged everyone with a sketch for June - 

Here's my take on it... something a little different for me :-)

Ingredients:
Shimmer Card - Miscellaneous
White Cardstock
Happy Birthday Photosafe Cellotape from 3M
Flourish With A Bling - Rhinestone - Bella Black
Bevy of Butterflies - Artist Lisa Hetrick UK413-A
Pink Ink - Hybrid
Black Pen

Here's the low down and need to know stuff:


Flourish With a Bling Challenge Rules
- You are required to use Flourish With A Bling products on your creation;
- You are required to use the above sketch as inspiration for your entry;
- You are required to upload your entry into the Flourish With A Bling Gallery under “Amanda’s sketch challenge 2012″;
- You can create a card, layout, OTP, home decor, anything you like;
- Challenge closes midnight Saturday 30th June, 2012;
- You can enter as many times as you like;
- You MUST have fun!
PRIZE – a fantastic pack of Flourish With A Bling goodies perfect to scrap more fabulous layouts or cards!!
. . . . . . . . .
Excited? Inspired? You should be! :)


Thanks for stopping by :-)
Jen

Sunday, June 17, 2012

Lovers' Garden - Arch, Lamp-posts, Bench seat.


Third and final instalment...

The fence for the arch was more vintage photo ink and coffee shop mists and the actual arch was silver paint and then roughly inked with black stazon.  I wound the yellow flower spray around the top and secured it with hot glue.  The fence and arch are secured to the garden with hot glue also and the flowers and leaves are used as decoration both sides of the fence but to also cover globs of hot glue!

In keeping with the silver and black for the 'metal' areas the lamp-post near the pond was also given the same treatment as the arch...

The Bench Seat was easy to put together (although be warned - it's harder to colour completely as it's mdf not chipboard) and a great addition teamed with another lamp-post.  The lamp-post has so much detail in the centre of the post part that too much handling by me meant that I snapped it BUT add some 'climbing' roses and hidden hot glue - and you'd never know!

I also added little charms for character - 
a butterfly for the purple rose
some snails - the hot glue looks like snail trail!
lots of geckos hiding and partially hiding 
a dragonfly on the fence and more fish in the pond 


Soooooo the finished piece in it's entirety:

Ingredients:
Twiddleybitz - Arch with Fence
Distress Stain - Vintage Photo
Glimmer Mist - Coffee Shop
Adirondack Dauber - Silver
Stazon Ink - black
My2Angels - Yellow Flower spray

Twiddleybitz - Paris Lampost (1)
Adirondack Dauber - Silver
Stazon Ink - black
My2Angels - All flowers and charms

Twiddleybitz - Park Bench
Distress Stain - Vintage Photo
Glimmer Mist - Coffee Shop
Mod Podge
Twiddleybitz - Paris Lampost (1)
Adirondack Dauber - Silver
Stazon Ink - black
My2Angels - All flowers and charms

I do hope you have enjoyed the process for each of the pieces of this creation and I hope I inspired with you and you'll share your own creation/s with me soon :-) Thanks for stopping by
Jen

Lovers' Garden - Leaves, "Grass", & Stepping Stones

Welcome to the second instalment of my Lovers' Garden.

The Garden Floor or "grass" is a Chipboard Sheet the size of a placemat.  I was intending on covering the open spaces with petal/flower soft but OMG - I had enough to do! LOL
I sprayed the leaves in a number of different greens and using this as a base for it gave colour and texture and it worked out quite well even though I never intended for it to be that way!
After they were sprayed I put them through the big shot to give them texture then rubbed more distress ink over them to give definition to the texture.


The stepping stones were made from chipboard inchies.  I used pumice stone distress stain and mod podged them - then when dry I put them through the big shot as well to also give them some 'stone' looking texture.

Here I was playing around with placement - they great thing about the FWAB pearls is you leave them on the acetate and you can move them around easily decided where they fit best :-)

I will explain the arch in my next post :-)

Ingredients:
Twiddleybitz Leaves Grab Bag
Glimmer Mists - Key Lime, Forest Green
Distress Inks - Peeled Paint and Pine Needles
Sizzix Texture fades embossing folder and Big Shot

Twiddleybitz Mosaic Grab Bag - BAS023 (inchies)
Distress Stain - Pumice Stone
Mod Podge
Sizzix Texture fades embossing folder and Big Shot

Flourish With A Bling - Chloe Olive Green
My2Angels - All Flowers

Thanks for stopping by - and my 3rd and final instalment isn't far away :-)
Jen

Saturday, June 16, 2012

Lovers' Garden - Pond, Bridge, & Gazebo

This was a project born of one simple request (can you please make a project with the bridge for the show Jen?) and my imagination ran overtime and the project kept getting bigger and bigger...  I am immensely proud of myself for taking on such a huge task and finishing it - in time!  There are many elements to this project so I will break them up as much as I can into separate blog posts.  Thanks for your patience and I hope you like it!  It was rather large and difficult to display at the Brisbane show recently and I would love to hear any ideas for how to display it at such events if you have any - thanks :-)

So without further ado...

A 6x6 Shadow box for the pond, misted blue inside, pumice stone distress stain on the outside, added some FWAB and fish tank pebbles inside then painted with modpodge and poured all over the pebbles to seal them.  This took almost 36 hours to dry/set.  I did not speed it up with a heat gun as I wanted the smooth shiny texture from drying naturally.

The Large Birdcage was perfect as a Gazebo - Vintage Photo Distress Stain and coffe shop Glimmer Mist and lots of Mod Podge.

The Large MDF Bridge was also given the same treatment as the gazebo. The supportive struts currently under the bridge were removed and extended from under the edge of the bridge to under the gazebo to stabilise it and increase the connection and angle needed to clear the pond - you will perhaps see this in a later photo.

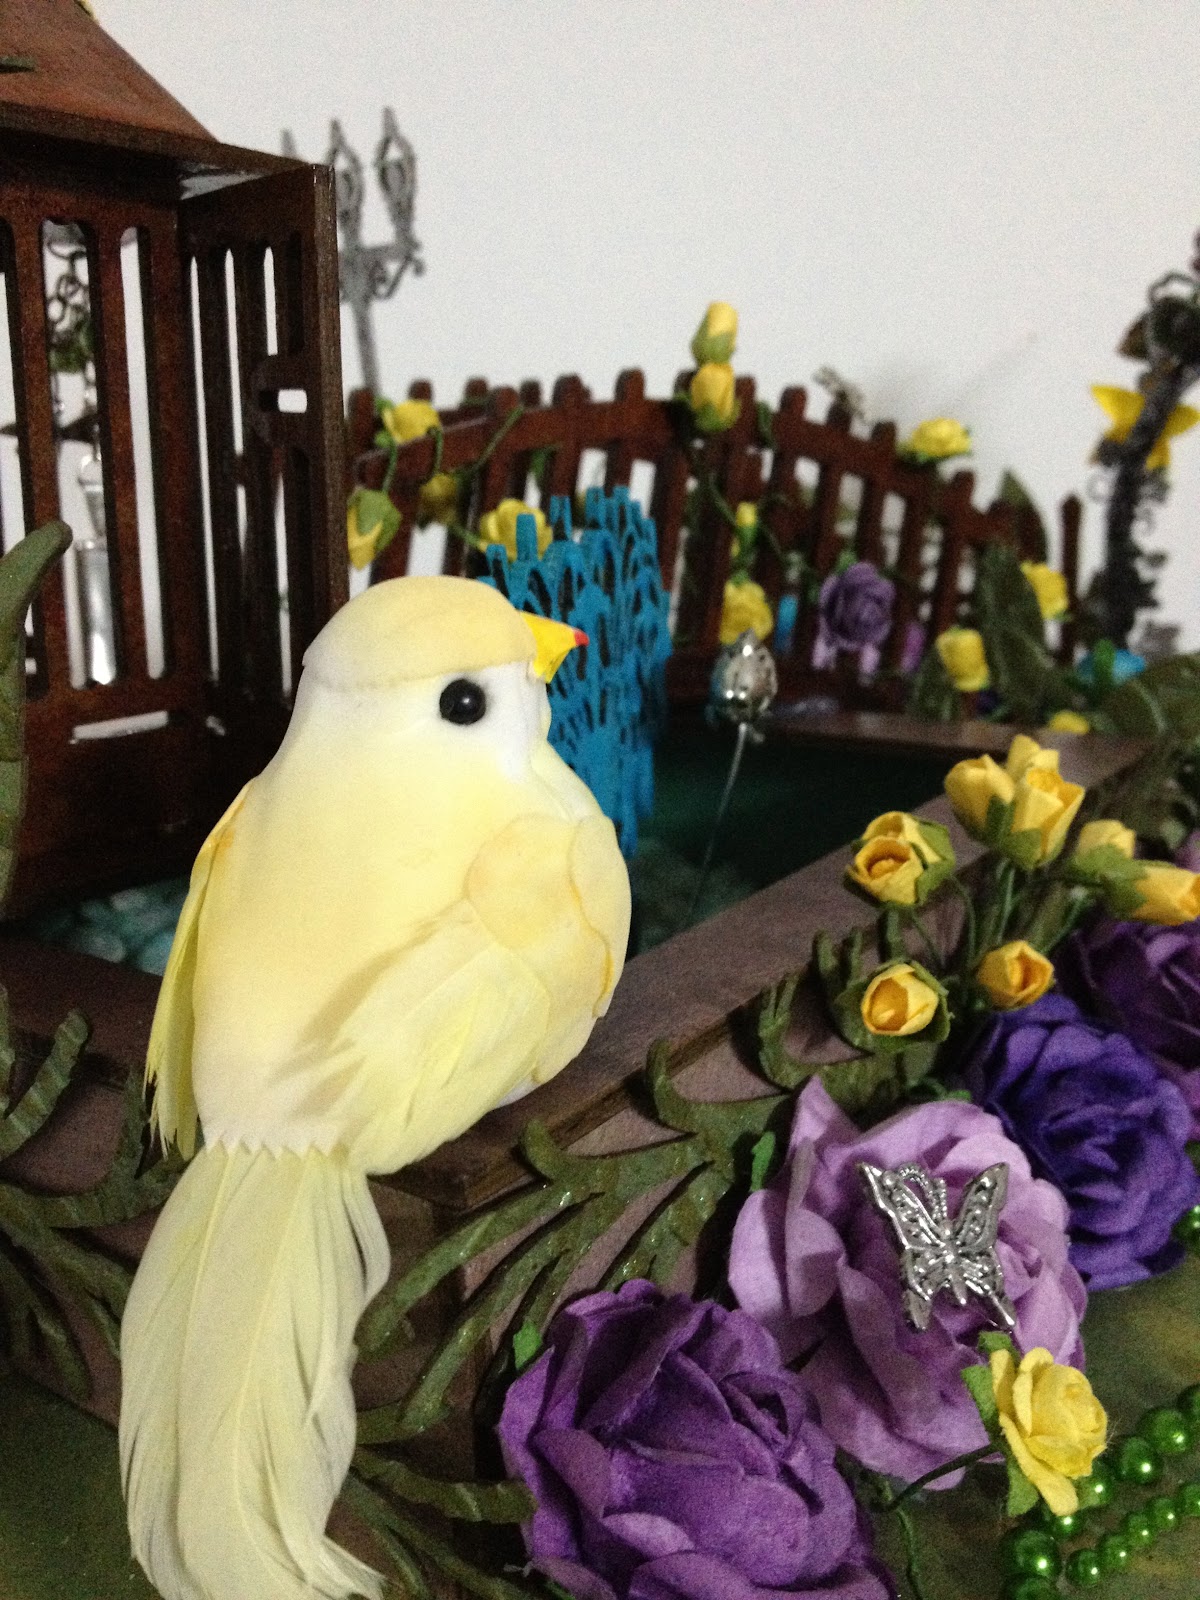
This view shows the bridge and gazebo over the pond.  I have added the roses and other charms or embellishments - all from My2Angels with the exception of the bird - she is a Twiddleybitz Bird.

You can see the pond better here - the upside down Chandelier works fabulously as a fountain and the fish charm looks great 'jumping' out of the water, I love the way the pearls add detail to the 'bottom' of the pond.  There are other fish charms also in the pond but cannot be seen in the photo below.

Ingredients:
Twiddleybitz - 6x6 shadow box
Twiddleybitz Mini Chandelier - CH002
Glimmermist Turquoise Blue
Distress Stain Pumice Stone
Distress Crackle Paint - Broken China
Flourish With A Bling - Grace Pearl Flourish in Teal
Fish Tank stones - white
Mod Podge
My2Angels Fish Charms
Twiddleybitz Yellow Bird

Twiddleybitz Large Bird Cage
Distress Stain - Vintage Photo
Glimmer Mist - Coffee Shop
Mod Podge
My2Angels Charming Chain, Bronze Floral Charm Combo, Bird nest & eggs

Twiddleybitz Large Bridge
Distress Stain - Vintage Photo
Glimmer MIst - Coffee Shop
Mod Podge
My2Angels Roses

Thanks for stopping by - don't forget to come back for the next instalment at 7am Sunday 17th of June - it will explain the leaves you see in the background :-)  Third and final instalment will be published 5pm Sunday 17th of June :-)

Cherish

Cherish - something we should all do with the "little" things in life..... 
so here's a "little" something to remind me...

A close up of the gorgeous Twiddley butterfly all bling'd up!

This was my first ever time using Prima flowers - I can now understand the hype, but I still cannot understand nor justify the outlay.

Ingredients:
Twiddleybitz ATC Shadowbox - SBS001
Tim Holtz Distress Stain - Peeled Paint
PipeDreamINK - Daintree opals
Stazon Ink - Black
Tim Holtz Distress Ink - Antique Linen
Stampin Up Stamp n Write - Garden Green
Twiddleybitz Butterfly Pack
Tim Holtz Distress Crackle - Tattered Rose
Distress Stickles Rock Candy
Flourish With A Blink - Adhesive Pearls - Copper
Prima Flowers - Bretton Vines, Alyssa
Art Spectrum ATC

Thanks for stopping by - I hope you too can remember to Cherish the "Little" things :-)
Jen

Thank you Manor House Creations!

Manor House Creations have been an Aussie wholesaler of beautiful flowers for a year now and I have been completely oblivious - BUT NO MORE!

Trudie Harrison introduced me to Nerrida at the MH Booth at the Brisbane Scrapbooking and Papercraft Expo and I was gob-smacked!  The booth was so pretty and colourful with great examples, and awesome affordable prices!!  I haven't looked back, I absolutely LOVE these gorgeous flowers - here's why...

And a close up so you can see the quality of these products:

 I am so completely happy, over the moon, drooling that I've not had ANY buyers remorse (and that's saying something!) so I have decided to try for the Design Team Position that is currently available.  Since leaving Green Tara I have not found anything quite as unique as these :-)  They are right up my alley and I couldn't be happier!

Ingredients:
White Bazzil Cardstock
Flourish With A Bling - Jasmine Lilac Puffy
Flourish With A Bling - Purple Pearls
Manor House Creations - Taneisha-WV (dark purple)
Manor House Creations - Ballroom Waltz (Lilac lacey flower)
Tim Holtz Distress Stain - Dusty Concord
Stampin Up - Thank you
Miscellaneous stamp

Thanks for stopping by - and don't forget to check out Manor House Creations for yourself!!
Jen

Saturday, June 9, 2012

Riley's Autos

This project has been in the planning stages for about 6 months LOL.  A wave shadowbox, in primary colours - and really 'boyish'. hmmmm planned and re-worked, painted, then put aside as I wasn't happy but over this last weekend I have managed to get it done and finished to where I am admittedly pretty proud of the way it turned out!   I found it quite hard as I'm not good at 'boyish' projects where I can't just add some flowers here and there!!

It was a truly group effort with a few suggestions from Matt, toy donations from the boys, and permission to pull their cars apart!  Ian lent me his blot cutters (don't ask!), and Erin also helped with a little colour advice too :-)

This really was so much fun to do - this shot shows the internal piece of a car that I pulled apart for the wheels, and the Tweeny Cogs from Twiddleybitz.  Also some small tools the boys found in their room!

This shows the stack of tyres in the back of the 'shop' and more cogs - a combination of the larger sprockets and the Tweeny cogs this time, and the boys tell me the banner at the top is "AWESOME"!

This was another thing the boys are raving about - the car on the top of the shop - they can't figure out why it's there but they reckon it's also "AWESOME"!

Ingredients:
Twiddleybitz - Wave shadow Box (SBW001)
Twiddleybitz - Wave Banner (BAN001)
Twiddleybitz - Sprocket Set (TRA008)
Twiddleybitz - Tweeny Cogs (TWBT011)
Tim Holtz - Distress Crackle: Scrattered Straw
Tim Holtz - Distress Crackle: Fired Brick
Tim Holtz - Distress Crackle: Broken China
Adirondack - Paint Dabbers: Citrus
Adirondack - Paint Dabbers: Silver
Stylish images - Clock
Miscellaneous Ribbon
Assorted Hot Wheels and el-cheapo toy cars and parts (8-10)
Assorted mini tools found in the boys toybox!

Thanks fo stopping by my blog - I hope I have inspired you to create!
Jen

Saturday, June 2, 2012

Oh Boy!

I love these photo's of Cameron - he's fast becoming a young man and these photo's show it!
I wanted to get back to doing double page layouts - maybe for a bit ;-)
I had fun getting inky and using lots of Chippy... The layout on the left side also started out as my interpretation of the sketch challenge for June at Twiddleybitz!!

Here's the sketch - click HERE for the sketch challenge (there is also a colour challenge, photo challenge, and holiday layout challenge!!!):

Here's my baby:

And a close up of the gorgeous pin from Tracy at My2Angels:

Ingredients:
Kaiser Thrill Seeker
The Craftersworkshop template - barbed wire
Twiddleybitz Cogs
Flourish With A Bling - Luke Flourish - Denim Blue
Tattered Angels Glimmer Mist - Denim Blue
Distress Ink - Fired Brick, Faded Jeans
Stampin Up Stamp N Write Marker - Basic Black
Stix2Anything - Double-sided Tape

Thanks for stopping by 
Jen  :-)


Fi's Collection

I made this printer's Tray for a dear friend of mine back in the new year and only just realised I haven't blogged about it!  This was made for a very dear friend of mine after I had dreamed about her... and like me, she loves purple :-)


On the back I have explained the meaning behind every charm...

Fi’s Collection
Fairy Dust to never stop believing in magic
Roses & blooms to remind you to take time to stop and smell them.
A pot of tea to share because you’re such a good listener
A microphone to encourage you to speak up and sing out loud.
The Eiffel Tower to remind you to take a break now and then -
with a plane to bring you back! 
A key so you don’t forget - “there’s no place like home”.
Lanterns so even in the darkness you have plenty of light
A boat to help you sail the rough seas that may lay ahead.
A butterfly to prove beauty comes from hardship and change
A Camera to record memories of your life & love, your hearts entwined.
A little girl for the one I see in your future
And a charm to tell you you’re going to be an awesome Mum.
Love You Much,   Jen  xxx

Some close-ups...


Is that a crochet butterfly?  I wonder where I got that from?

Ingredients:
Twiddleybitz Printer's Tray
My2Angels Charms, flowers, flowerspray
Flourish With A Bling Purple Chloe Pearl Flourish
Crochet By Kim purple butterfly
Assorted items from my stash

Thanks for stopping by,
Jen