Background

Showing posts with label Inchies. Show all posts

Sunday, June 17, 2012

Lovers' Garden - Arch, Lamp-posts, Bench seat.


Third and final instalment...

The fence for the arch was more vintage photo ink and coffee shop mists and the actual arch was silver paint and then roughly inked with black stazon.  I wound the yellow flower spray around the top and secured it with hot glue.  The fence and arch are secured to the garden with hot glue also and the flowers and leaves are used as decoration both sides of the fence but to also cover globs of hot glue!

In keeping with the silver and black for the 'metal' areas the lamp-post near the pond was also given the same treatment as the arch...

The Bench Seat was easy to put together (although be warned - it's harder to colour completely as it's mdf not chipboard) and a great addition teamed with another lamp-post.  The lamp-post has so much detail in the centre of the post part that too much handling by me meant that I snapped it BUT add some 'climbing' roses and hidden hot glue - and you'd never know!

I also added little charms for character - 
a butterfly for the purple rose
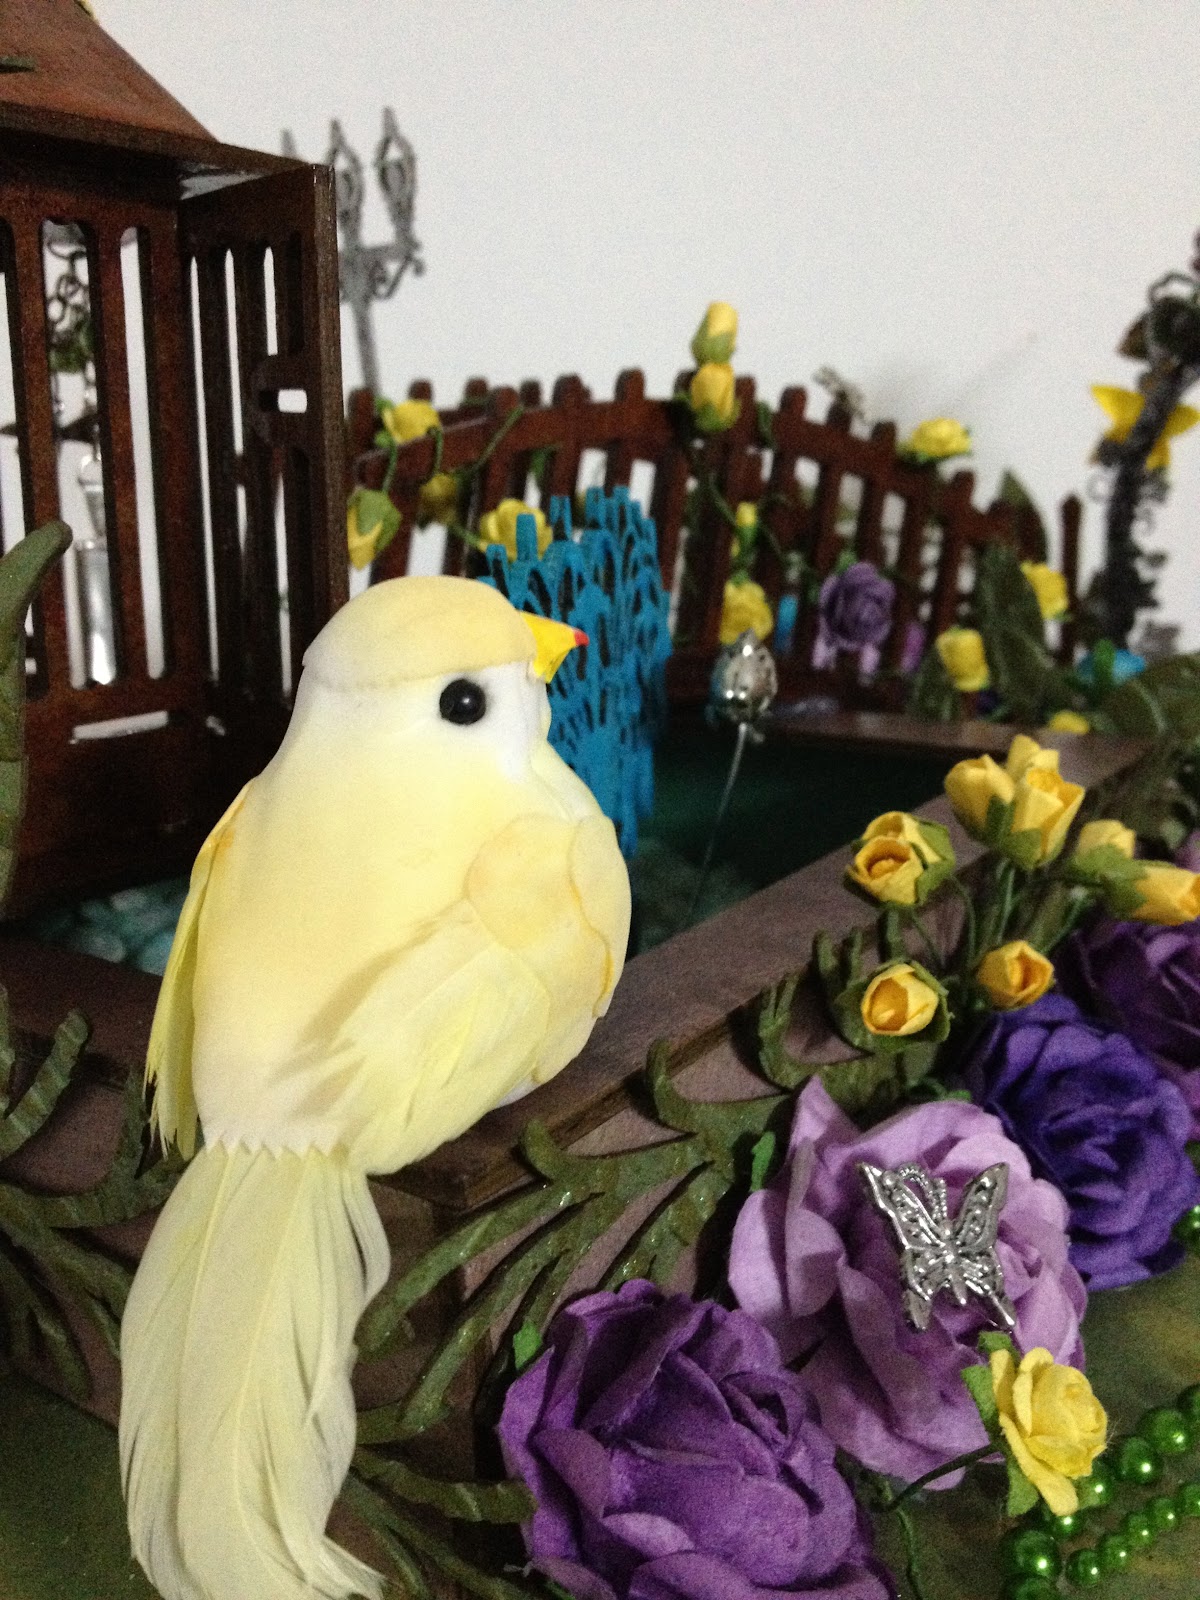
some snails - the hot glue looks like snail trail!
lots of geckos hiding and partially hiding 
a dragonfly on the fence and more fish in the pond 


Soooooo the finished piece in it's entirety:

Ingredients:
Twiddleybitz - Arch with Fence
Distress Stain - Vintage Photo
Glimmer Mist - Coffee Shop
Adirondack Dauber - Silver
Stazon Ink - black
My2Angels - Yellow Flower spray

Twiddleybitz - Paris Lampost (1)
Adirondack Dauber - Silver
Stazon Ink - black
My2Angels - All flowers and charms

Twiddleybitz - Park Bench
Distress Stain - Vintage Photo
Glimmer Mist - Coffee Shop
Mod Podge
Twiddleybitz - Paris Lampost (1)
Adirondack Dauber - Silver
Stazon Ink - black
My2Angels - All flowers and charms

I do hope you have enjoyed the process for each of the pieces of this creation and I hope I inspired with you and you'll share your own creation/s with me soon :-) Thanks for stopping by
Jen

Lovers' Garden - Leaves, "Grass", & Stepping Stones

Welcome to the second instalment of my Lovers' Garden.

The Garden Floor or "grass" is a Chipboard Sheet the size of a placemat.  I was intending on covering the open spaces with petal/flower soft but OMG - I had enough to do! LOL
I sprayed the leaves in a number of different greens and using this as a base for it gave colour and texture and it worked out quite well even though I never intended for it to be that way!
After they were sprayed I put them through the big shot to give them texture then rubbed more distress ink over them to give definition to the texture.


The stepping stones were made from chipboard inchies.  I used pumice stone distress stain and mod podged them - then when dry I put them through the big shot as well to also give them some 'stone' looking texture.

Here I was playing around with placement - they great thing about the FWAB pearls is you leave them on the acetate and you can move them around easily decided where they fit best :-)

I will explain the arch in my next post :-)

Ingredients:
Twiddleybitz Leaves Grab Bag
Glimmer Mists - Key Lime, Forest Green
Distress Inks - Peeled Paint and Pine Needles
Sizzix Texture fades embossing folder and Big Shot

Twiddleybitz Mosaic Grab Bag - BAS023 (inchies)
Distress Stain - Pumice Stone
Mod Podge
Sizzix Texture fades embossing folder and Big Shot

Flourish With A Bling - Chloe Olive Green
My2Angels - All Flowers

Thanks for stopping by - and my 3rd and final instalment isn't far away :-)
Jen

Saturday, June 16, 2012

Lovers' Garden - Pond, Bridge, & Gazebo

This was a project born of one simple request (can you please make a project with the bridge for the show Jen?) and my imagination ran overtime and the project kept getting bigger and bigger...  I am immensely proud of myself for taking on such a huge task and finishing it - in time!  There are many elements to this project so I will break them up as much as I can into separate blog posts.  Thanks for your patience and I hope you like it!  It was rather large and difficult to display at the Brisbane show recently and I would love to hear any ideas for how to display it at such events if you have any - thanks :-)

So without further ado...

A 6x6 Shadow box for the pond, misted blue inside, pumice stone distress stain on the outside, added some FWAB and fish tank pebbles inside then painted with modpodge and poured all over the pebbles to seal them.  This took almost 36 hours to dry/set.  I did not speed it up with a heat gun as I wanted the smooth shiny texture from drying naturally.

The Large Birdcage was perfect as a Gazebo - Vintage Photo Distress Stain and coffe shop Glimmer Mist and lots of Mod Podge.

The Large MDF Bridge was also given the same treatment as the gazebo. The supportive struts currently under the bridge were removed and extended from under the edge of the bridge to under the gazebo to stabilise it and increase the connection and angle needed to clear the pond - you will perhaps see this in a later photo.

This view shows the bridge and gazebo over the pond.  I have added the roses and other charms or embellishments - all from My2Angels with the exception of the bird - she is a Twiddleybitz Bird.

You can see the pond better here - the upside down Chandelier works fabulously as a fountain and the fish charm looks great 'jumping' out of the water, I love the way the pearls add detail to the 'bottom' of the pond.  There are other fish charms also in the pond but cannot be seen in the photo below.

Ingredients:
Twiddleybitz - 6x6 shadow box
Twiddleybitz Mini Chandelier - CH002
Glimmermist Turquoise Blue
Distress Stain Pumice Stone
Distress Crackle Paint - Broken China
Flourish With A Bling - Grace Pearl Flourish in Teal
Fish Tank stones - white
Mod Podge
My2Angels Fish Charms
Twiddleybitz Yellow Bird

Twiddleybitz Large Bird Cage
Distress Stain - Vintage Photo
Glimmer Mist - Coffee Shop
Mod Podge
My2Angels Charming Chain, Bronze Floral Charm Combo, Bird nest & eggs

Twiddleybitz Large Bridge
Distress Stain - Vintage Photo
Glimmer MIst - Coffee Shop
Mod Podge
My2Angels Roses

Thanks for stopping by - don't forget to come back for the next instalment at 7am Sunday 17th of June - it will explain the leaves you see in the background :-)  Third and final instalment will be published 5pm Sunday 17th of June :-)

Tuesday, March 29, 2011

Oldies...

Some (lots LOL!) more oldies I found and thought you might like :-) TFL

A frame made years ago for the in-laws...

 A fridge magnet - with an actual pocket to hold pens :-)

love this card - mainly the colour combo

Gorgeous AED PP

I "paper tole'd" it!

Just realized it could be titled "wet dream" because of the clear opals!  OOPS!! ROFLMAO

Opals on Twiddley

A notebook

My art doll made entirely from opals and some chain - i developed the 'lava technique' for her hair the very same weekend annette did for some of her art - great minds think alike!

AED Christmas Papers

AED and Twiddley Christmas

 More AED and Twiddley Christmas


Even  More AED and Twiddley Christmas

A larger notepad for Erin - she loves to write down things people say!

AED card

Another AED card

Love the colours in this one

more AED :-)

Love love love this notebook

another notebook - the fan is from the paper and is on pop dots

more hand cutting from the paper on this notepad

simple card

Another larger notepad - confiscated by Erin :-)

inchies with Twinkling h20's

opals on a wooden frog

AED paper and glitter on chippy

A fold out pocket card I made years ago for Erin's Birthday.

my gorgeous baby girl :-)

If you made it all the way down here - I thank you whole-heartedly - I know it was a long way... thanks for sticking with me :-)

Monday, August 9, 2010

Christmas Inchie

Merry Christmas!!

I got all inspired on the weekend with the Twiddleybitz blog hop and a vist to my new bestie's house (lol hi Lisa!) so - here's an inchie!


Ingredients:
Twiddleybitz inchie
Twiddleybitz tiny Christmas tree
Twiddleybitz crafty notions colour spray - poppy
Twiddleybitz crafty notions colour spray - fern
Kaiser basics gold bling
Alison Ellis Design PP - so this is Christmas green swirl
Black stazon ink
Penny black "Merry Christmas" stamp
Helmar spray adhesive
Alison Ellis Design glitter - white sparkle

You can't see the stamp in the stazon on the tree too well in the photo but you can IRL. I hope you like it - thanks for looking!!!

Mwah! XXX
Jen

P.S. I'll post the winner of my blog hop prizes later tonight!