I revisited some old stamping techniques from years ago this week... Re-inspired by the new Tim Holtz Masking sheets to make your own Masks!
Taping the edges of the mask down with tape was unnecessary as the mask is sticky backed BUT as the mask did not have a large border, the washi tape protected the card a little like masking tape on walls when painting!
Then the second - Dusty Concord; and third - Seedless Preserve:
Black Archival Ink from Ranger on the Kaiser Stamp for a lovely crisp image:
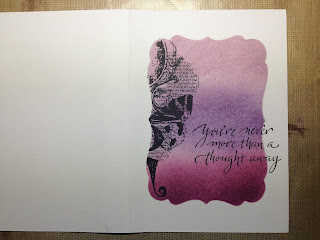
And then again on a 'verse stamp' - removing the mask first and stamping outside the inked area creates another focal point:
Use a section of your mask to use the same inking effect to tie-in your envelope, BUT ink with the central colour first and then you can blend the colours either side into the middle and you will avoid the colour "halo" you can see through the top colour on the card.
And the finished card - inked around the edges with the three colours too!
ALSO -
I couldn't help visiting the Tuesday Ladies at My2Angels while on my lunch break, and couldn't resist getting all creative - with a lolly bag!!!
- Grab a paper bag (eat the lollies!!)
- spray with Key Lime Pie Glimmer Mist
- then with a stencil cover a thin coat of Blackberry Ferro
- sprinkle purple passion sugar beads while wet. press in with a sheet of chippy and a heavy book
- add small daisy flower charm to pin and curl end over - attach with glossy accents
- spray the green gardenia with olive glimmer mist and attach with glossy accents over the same place as the pin
- add a bit of claudine hellmuth multi-medium on the flower and sprinkle over with diamond dust.
- add white opals liquid pearls to centre of flower charm
Thank you for stopping by - I hope you've enjoyed this post and the techniques used!!
Jennifer
:-)


TFS these great projects, the templates look fairly easy to use and they have a great effect, especially on the card.
ReplyDelete