Background

Friday, December 28, 2012

Happy Birthday...

I made this card recently for a friend whose favourite colour is blue :-)

  1. I die cut the tag shape from a piece of card so I could use the negative as a stencil and graduated the three distress ink colours using the sponging method.  
  2. I then sprayed the Manorhouse flowers with blue colour spray to deepen the colour
  3. I stamped the happy birthday greeting in midnight blue stazon
  4. While the flowers dried, I stamped the envelope, sponged it, and dragged the stazon inkpad around the edges of the envelope and card for definition.  
  5. I stamped inside the card with another birthday greeting
  6. Then attached the flowers with hot glue.

Ingredients:
Twiddleybitz - White C6 Card
Manorhouse Creations - blue flowers
Tim Holtz Distress ink -
Stazon Ink - Midnight
Die Cut Shape -
Miscellaneous happy Birthday Greeting
Stamp It greeting - Happy Birthday (inside the card)

TFL - Mwah! XXX
Jen

Hello Stranger!

Hello Everyone!

My depression unfortunately has been overshadowing much of my life recently and I have had a harder time than normal dealing with it.  Probably because it came on in a different way - not with my usual triggers, so I was denying that I'd had a relapse.

Recently I found the courage to open up and tell my mum about a secret I've kept for 25years.  I am not ready nor strong enough to say it here (perhaps I'll write a book about it), this was very hard for me to do, and it's just as hard for me to talk in riddles but I feel the need to justify myself and apologise for my absence.  I have obligations to companies and I have not recently fulfilled them, the guilt is eating me up.

2012 has been a very rough year for me personally, but I am looking forward to 2013.  There are so many things to be thankful and positive about so I will focus on them.

  • My Cousin Lee had her first baby last night. Isabella Jayde and Lee are both healthy and happy.  I am so proud and soppy right now!  Lee is more like a little sister to me than a cousin.
  • My Mum is moving forward and while the next few months will be hard for her, i believe she Will be happier than she's ever been.  I see a woman who's been downtrodden and 'old' for so long finally emerging from her old life like a butterfly emerging from a cocoon.  I am here for her and will support her in every way possible.  I want to rebuild our relationship and have my best friend back.
  • My children are growing up!  They are healthy (mostly - and when not, we are managing the issues!), and happy although they fight like cats and dogs - but that's normal!!  My baby first born is 12 years old now and next year will be in his final year of primary school - he's worked so hard and I'm so proud of him.  
  • My baby girl is growing up too fast - 10 going on 25, head strong, and independent.  I have no idea where she gets it from but I (think) I'm ready to meet her and guide her and encourage her!  She's smart and creative and I can't wait to share her achievements with her - starting with her position in the Australian Youth Choir!
  • My Smiley Riley - will be my baby boy forever, But - he's 8 now and finally starting to be independent and develop his own personality instead of being overshadowed by his older siblings.  He too has been offered a position in the Australian Youth Choir and is looking forward to meeting other boys whom like to sing!  I am so proud of him.
  • I have planned time away for myself and the kids in January before school goes back, so excited to be taking them on a road trip - just the four of us, it's a first!!
  • 2 working trips to Melbourne are planned for Paperific...
  • A trip to New Zealand to teach again at Paper Scissors Chocolate retreat in Auckland :-)
  • A trip to Ayers Rock for Easter with my wonderful supportive man.
  • I have a goal - to lose 32kg + in 52 weeks.  I MUST do this.  My health, my life, depend on it in sooo many ways.
  • There are may more but I'll not list them all here just now! LOL
I like to be busy and hate to let anyone down.  I am told to trust people more, to open up so they can prove I can trust them as they are sure to understand and/or support me, that I am not alone in the world.  So thank you - from the bottom of my heart, for reading this far and for being my friend.  It means more than you could know!

I hope you all had/are still having(!) a Merry Christmas and a beautiful, bright, and promising New Year for 2013!  


Jen

Friday, December 14, 2012

Dec 25th - Faux Washi


Hello Everyone, I'm here today with my first official post for Stix2Anything!

Being on a tight budget, versatility is a very important thing for me, so today I wanted to show you how versatile the Stix2 products can be!

I have stencil tape, it's a low tac tape designed to adhere, be removed, and re-adhere a number of times for using in stencilling (holding the stencil in place while using different medium for effect)
I'm sure you've seen the popularity explosion of Washi tape - well I have so many stamps - and over 80 ink pads that also I'm compulsive and purchase Washi tape - I also make my own using stencil tape!

First you design your card and decide on the colour and style you need.
Then you adhere a length of the stencil tape to your non-stick crafting sheet and colour with your ink and sponger - experiment with different types of ink and application techniques as water-based inks will have a different effect to alcohol based inks etc... and also taking into account the tape is cream in colour, not white - to begin with.

Then use a permanent ink to stamp your design on the tape - I've used stazon and made sure to stamp off my tape as well so that it's less rigid and 'ribbon-looking' if you know what I mean!
(and don't worry, the permanent ink does come straight off with a bit of stazon stamp cleaner :-))

so now we have made our washi tape we adhere it to our card/project (remember it may still be slightly transparent)

and here's a closeup -

To make the card I have used a pre-scored and folded card - inked the edges of the card and the patterned paper panels with the same colour ink I used for the tape.
I used Stix2 double sided tape to attach the paper panels to the front of the card.
I stamped my 'Dec 25' greeting in the stazon ink for longevity and again used the inks around the edges of the diecut.
This was then attached to the front of the card using the Stix2 adhesive foam tape.

This was a very simple card but the focal point is the eye-catching home-made faux washi tape :-)

I hope you like my first card and enjoy making your own washi tape!
Be sure to visit the Stix2Anything website to grab some stencil tape and get creating!
Jen
:-)

Ingredients:
Adhesives - Stix2Anything double sided tape, adhesive foam tape, stencil tape
Stix2Anything non-stick crafting sheet
Twiddleybits pre-scored and folded white card 13x13 cms
Patterned paper by Alison Ellis Design
Joy stamp by Sparkle n Sprinkle - available through Alison Ellis Design
Tsukineko Stazon innk - Olive Green
Ranger/Tim Holtz Distress Ink - Picket Fence
Kaiser Stamp Set CS727 - Dear Santa Collection
Mpress nesting scallop die

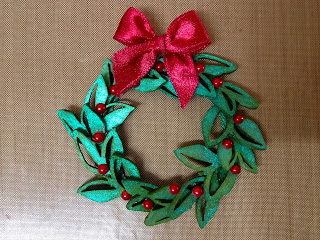
TWBZ Wreath Card

I had so much fun making this card and it all started with a few branches!!


Intructions:
First I sprayed the leaves both sides with green sparkly spray:
 Then I cut a wreath using two circle cutters through my bigshot:
 I cut the leaves so they were separate parts and gave them another spray to really sparkle:
Once dry, I laid the leaves out and began attaching them to the wreath:
 I had a few spare:
 Then I added some bling for berries:
 And a bow at the top (that I later changed to white):

Ingredients:
Cardstock - red
Cardstsock - white embossed
Red Green and White striped Ribbon
Green Tara - White pre-tied bow
Twiddleybitz - Alpha Square (ALP004)
Twiddleybitz - Fern Leaves Set of 4 (FER001)
Flourish With A Bling - Adhesive Pearls - Red
Lindy's Starburst Stain - Green Goblin
Adhesives by Stix2Anything


Thanks for stopping by - I hope to see you creating wreaths of your own - let me know when you do!!
Jen
:-)

Monday, December 10, 2012

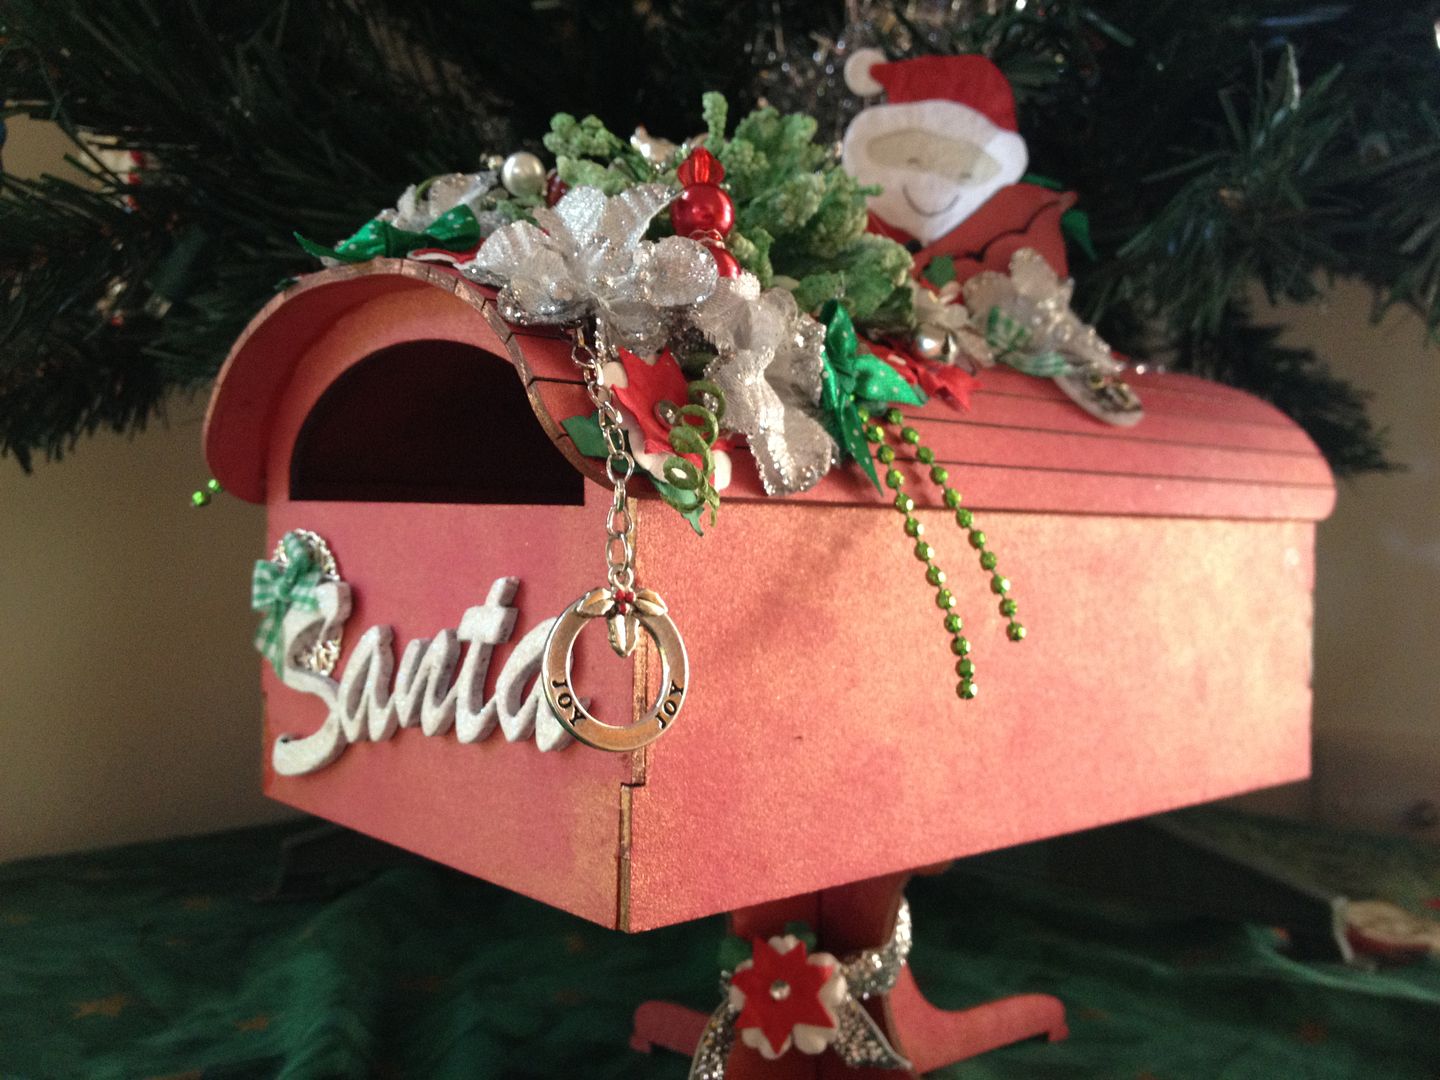
Santa's Mailbox

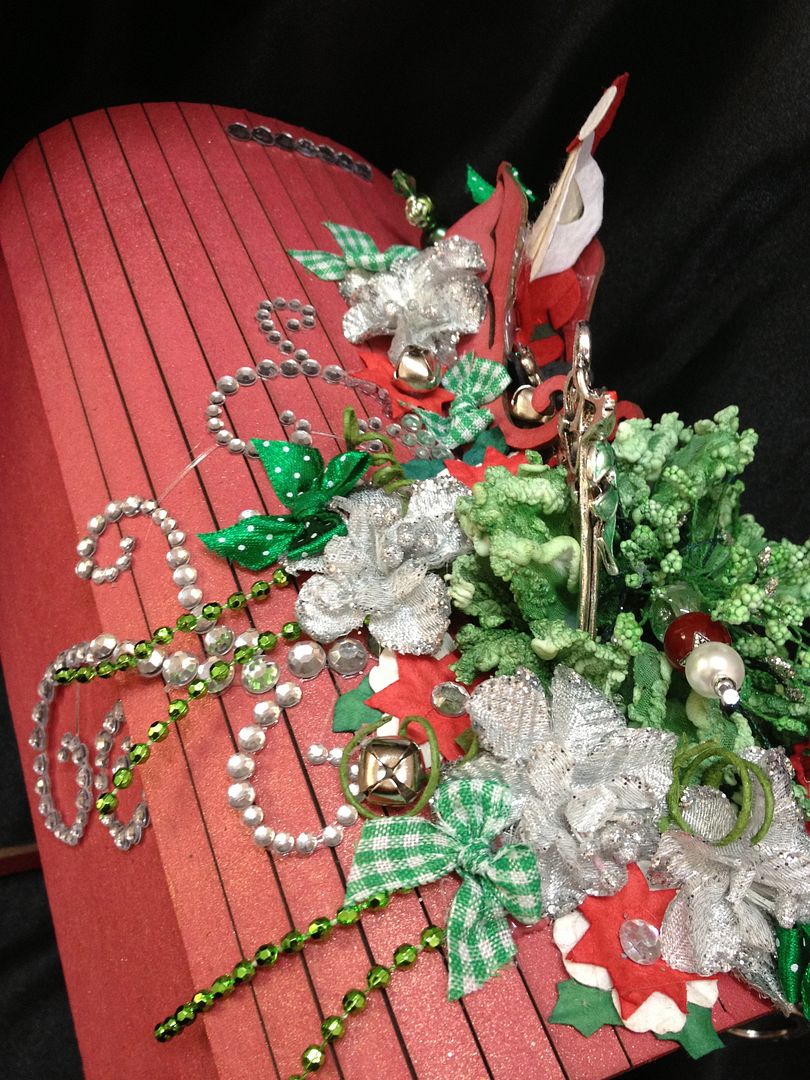
When I saw these new mailboxes from Twiddleybitz I just had to have one right away!  I started on it the second night I had it and colour-sprayed it first thing! Unfortunately I had to put it (and creating in general) aside for a while but I finally managed to finish it the other night.  I am quite please with how it turned out.. I got to use some of my favourite products and I love that I stuck to traditional red and green for Christmas.
I followed the instructions sheet that was included to assemble and started gathering flowers and embellishments to decorate the top.  I started with the gorgeous Elise Flourish:
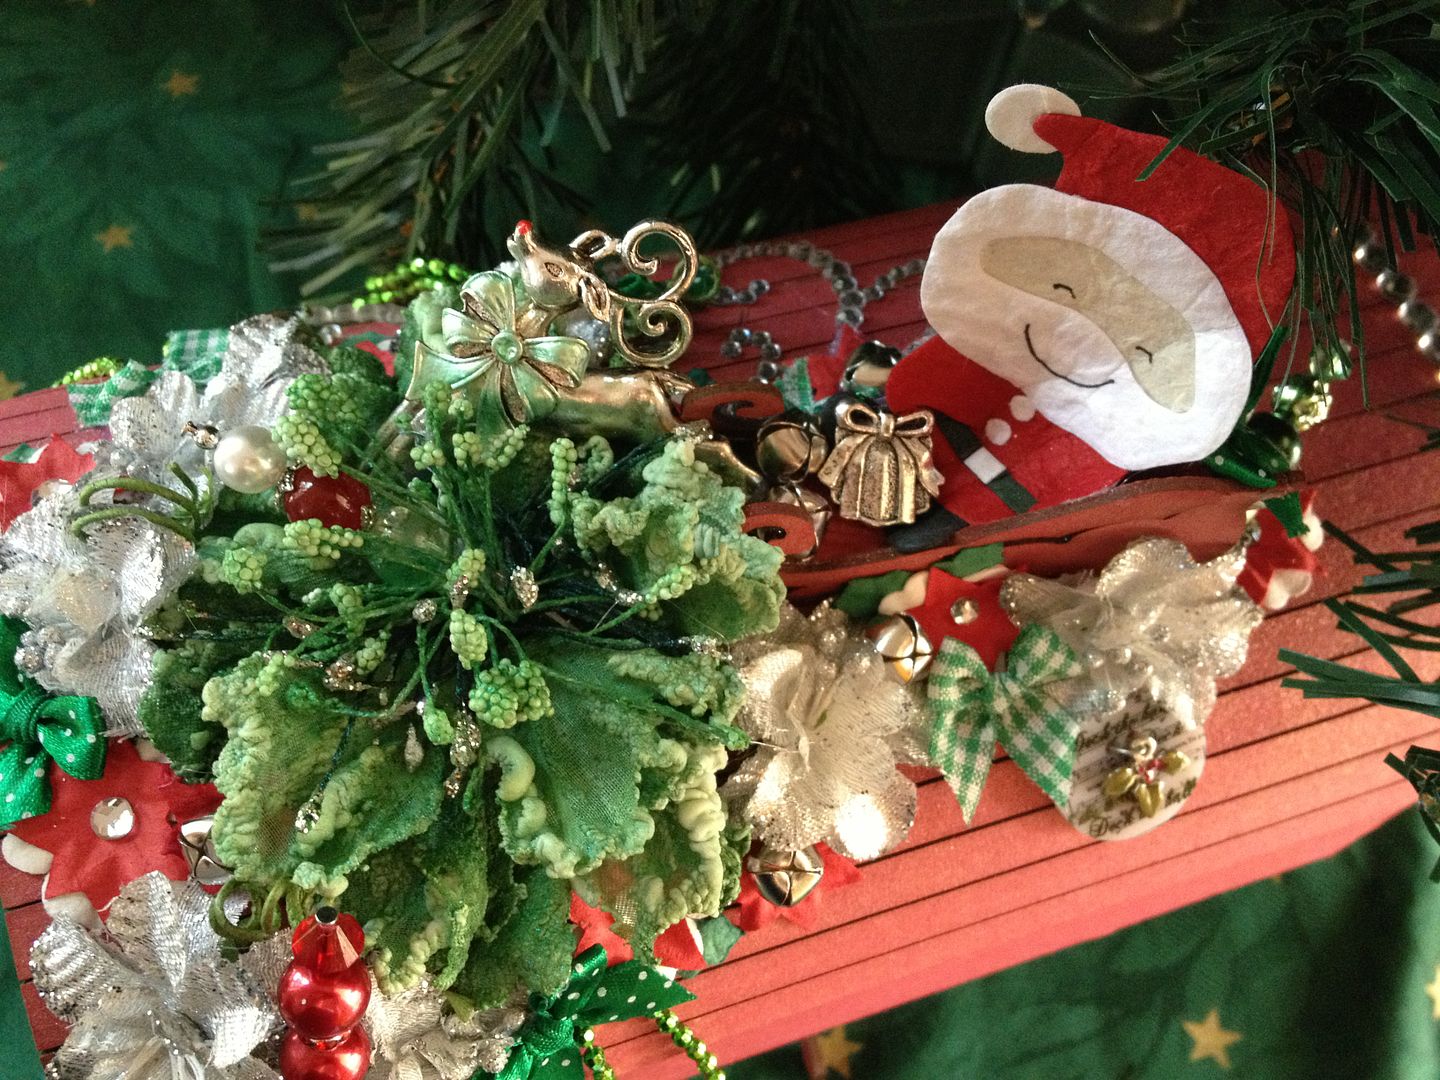
I made the small Twiddleybitz sleigh - added Santa and made Rudolph a bit fancy with my liquid pearls. I sprayed the Manorhouse Creations flower with the green colour spray from the halloween Lindy's Starburst pack:
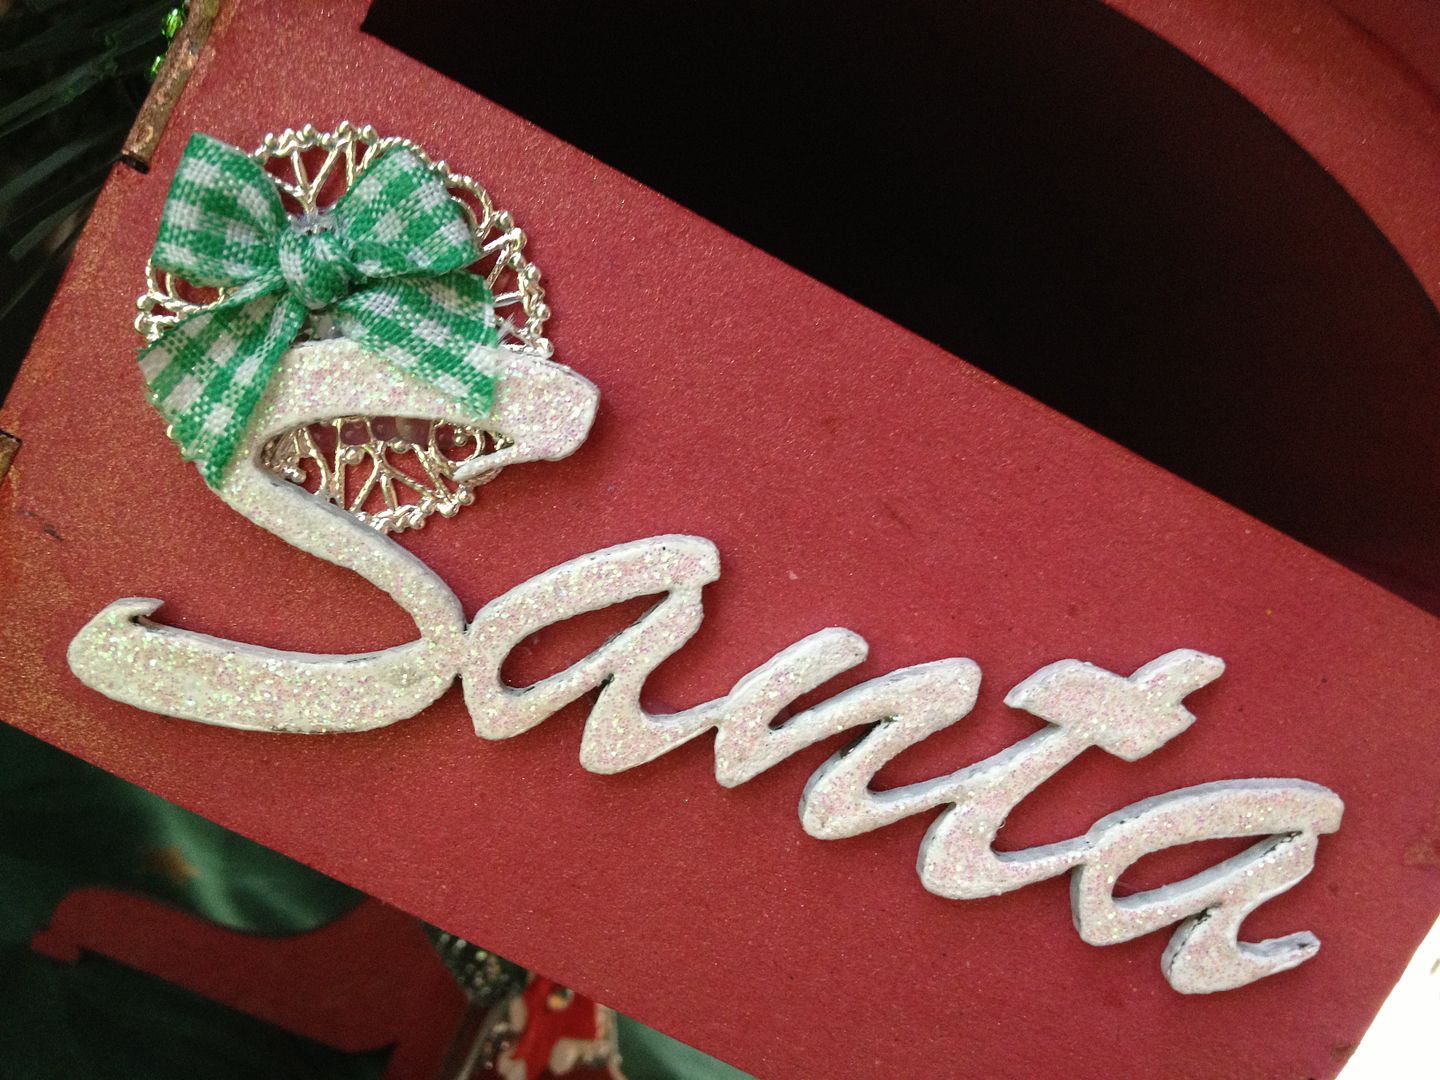
I covered the "Santa" with White Opals embossing enamels and completely covered in kindy glitz, it took a while to dry - then attached it with the embellishments from My2Angels.
Then I tied some matching ribbon around the stand and added a leftover flower.

Ingredients:
Twiddleybitz - Mail box Kit
Twiddleybitz - Santa word
Tattered Angels Glimmer Mist - Red nosed Reindeer
Lindy's Starburst - Freaky franken-lime
Manorhouse Creations - Winter Song - Log Cabin (lrg green flower)
Manorhouse Creations - small silver flowers
Flourish With a Bling - Elise Clear Rhinestone Flourish
Flourish With a Bling - Clear Rhinestones
Crochet By Kim - beaded pins - (Christmas set of 3)
My2Angels - all charms
My2Angels - all bows
My2Angels - all ribbon
My2Angels - all mini bells
My2Angels - Rudolf
Ranger - liquid pearls, ruby red and mint green
Pipe DreamINK - opals, snowgum
Matisse Derivan - Kindy Glitz, christalina
Green Tara - Santa die cut
I also used PVA by Stix2Anything to assemble the sleigh and mailbox.

I hope you like our new mailbox for our Letters to Santa!
Thanks for stopping by -
Jen
:-)

Sunday, December 9, 2012

Lennox

For a beautiful bouncing little boy whom arrived on Saturday.

Ingredients:
Bazzil Cardstock
Stazon black ink
Twiddleybitz - Itty Bitty Alpha in pink - coloured black with stazon
Twiddleybitz - Baby Bunting (BOR028)
Flourish With A Bling - Adhesive Rhinestones - Antique Brown
Ranger/Tim Holtz - crackle paint
Ranger - Liquid Pearls (onyx)
Matisse Derivan - Kindy Glitz
Foam Tape from Stix2Anything
Assorted Ribbon

Thanks for stopping by!!
Jen
:-)

Flourish With A Bling - Nov Challenge


Just realised this never published (from a few weeks ago now!)  Sorry!!


Hello Everyone!

Well I've finally gotten around to showing you my take on the November challenge with Flourish With A Bling - I used the sketch for a Christmas Card...
From this sketch - 
 A close up of the Elise I've cut up and re-set....
Ingredients:
Twiddleybits card
Kaiser papers
"Elise" flourish and flower from Flourish With a Bling!
Doily die from My favourite things
Ink and distresser
Bow from Green Tara

Thanks for stopping by!
Jen

Friday, November 23, 2012

Santa's Chair!!

I think these chairs from Twiddleybitz are super cute and have loved all the soft feminine chairs that people have created with them but I wanted to do something a bit different!  Christmas gave me the perfect opportunity to make Santa's Chair!!

I started by painting the poppy colourspray onto the MDF - spraying doesn't work so well as it beads on the wood.
Then I glued all the pieces together with pva - this was super easy as they slot together perfectly!
Embellishing the chair was again extremely easy as I used a Christmas embellishment pack from my2angels.net!  I didn't have to make any pins, rosettes, tags or do any embossing!!
Here's the gorgeous rosette on the front of the backrest and the two 'star cushions'!
I did however sew the pincushion!!! yay me!  dusted off the sewing machine - it's been a while BUT I cheated with the Santa Sack and put cushion stuffing in a pre-made organza bag :-P.  I added the green sparkly ribbon from the pack and the gorgeous charming chain too.
And a side view too :-)
Ingredients:
Twiddleybitz - MDF Chairs, 2pk (MDF02)
My2Angels - Christmas Embellishment Kit (Brisbane Show Purchase)
My2Angels - Merry Christmas Charming Chain with Glass Abacus
My2Angels - Charming Pins 
My2Angels - Felt Shapes
My2Angels - Green Glitter Ribbon
Colorful Thoughts Sprays - Poppy
Tattered Angels - Glimmer Mist, Scarlet
Red Material
Red Organza Bag
Cushion stuffing
PVA Glue

Stay tuned for my next Christmas Twiddleybitz Off the Page Project!  It's so exciting!!
Jen
:-)

Sunday, November 18, 2012

Stix2 Anything!!

I am so excited to let you know, I'm now the Card Designer for Stix2 Anything products, I've been using them since their first show in Melbourne at Paperific!  I look forward to sharing a number of techniques and styles with you made all the more fun and easy using Stix2!


While my style is varied I have learnt so very much over the years and rarely use all the things I know in my work.  The thought of exploring adhesives as a design tool is quite exciting! It makes a big change from just 'using' glue and tape!

Please visit Stix2 Anything HERE on the web (you can order from them as they do sell to the consumer directly!), or HERE on Facebook.  Not only do they have an awesome range of adhesives but a number of tools too - I am LOVING my pickup pencil and am looking at getting a layer perfect... While I make my cards and line up my photo matts etc by eye - I think it would be an awesome tool (for the OCD in me!) for helping with classes and blog write-ups!!

I have used a few of the Stix2 Anything products but so far my favourite would have to be the double sided tape, it is very sticky and quite permanent, sometimes it can be a little tricky to remove the backing but I see that as a small price to pay for knowing the elements of my projects will not come off.  My work goes on tour with Twiddleybitz and is handled a lot at the shows - or in class and it's imperative that it stays together!

You can see some of the projects I have created using Stix2 Anything products HERE, but stay tuned for more to come!  I will be resurrecting some old techniques you may not have seen for quite a while!!

The Stix2 blog is also a great place to visit, my tutorials and work will be HERE shortly :-) 

My first creations published next month will be all about..... Christmas!! LOL how ever did you guess!! hehehe or should that be ho ho ho?

I'm looking forward to it - I hope you are too!
Jen
:-)

Monday, November 12, 2012

Bedside Brick Lamp

Erin has decided she wants to change her bedroom from pink to blue coloured... so out goes the netting curtain, the pink bed spread, and the pink glitter lava lamp.  All the blue furnishings I can find are predominantly boyish so we're having a bit of trouble.  When she burnt herself on the lava lamp the other night It gave me the swift kick I needed to make her a girly lamp for her room.

I bought a hollow glass brick from Bunnings for $5 (like the ones you used to see in the Dr Surgeries as   a kid) and I painted around the edges in Sailboat Blue Alcohol ink, then when dry I adhered white lace around the edges over the blue.  I then stamped the butterfly and the verse in Midnight Blue Stazon Ink.  Adding the beautiful Flourishes was next... then adding a heap of the gorgeous Manorhouse Creations flowers!!
I jazzed up some of the flowers, and the butterfly wings with iridescent medium and added a little butterfly charm to one of the flowers too.
I have recently discover IKEA (I know slow on the uptake but OMG!) and they have LED strip lighting! I bought this one for $20 and one panel is just too long... I cannot cut it down so already have an alternate use for it...  I am contemplating drilling a hole in the corner of the brick and putting fairy lights inside instead!

I'm really pleased with how this turned out - and the best part is that Erin had no idea!! When I showed her and then told her it was for her room - she nearly cried! She loves it so much :-)

Ingredients:
Glass brick - Bunnings
Ranger Alcohol Ink - Sailboat Blue
Green Tara - very wide white lace
Stazon Ink - Midnight Blue
Miscellaneous Stamp - All things
Bevy of Butterflies Stamp - UK413A by Lisa Hetrick
Flourish With A Bling - Chloe Pearls - Baby Blue
Flourish With A Bling - Chloe Pearls -Blue
Manorhouse Creations - Country Lane raindrop
Manorhouse Creations - Fairy Floss, soft blue
Manorhouse Creations - Silver Capri
Manorhouse Creations - Royalty Duchess Mix (blue with ribbon)
Windsor and Newton Iridescent Medium
My2angels - silver butterfly charm
IKEA - LED strip light.

Thanks for visiting!
Jen
:-)

Altogether Beautiful...

Yep - still loving my step cards!!! LOL
One of my favourite colour schemes - black, white, silver/grey :-)

You know by now how much I LOVE the round doily frames from Twiddleybitz!!  I stazon inked the outside but removed the inner circle so I could ink it white - then stamped in black stazon, stuck it back in the middle and added the flourishes and the gorgeous flower!
I love the mannequin and just had to make her pretty - diamonds are a girls' best friend you know!
And no - I didn't have to tie the bow as it's a pre-made one from Tracy at my2angels!!
Ingredients:
Silver shimmer card - pre cut and folded
Black Bazzil cardstock
Patterned Paper - Kaiser 61/2 inch pad - The Lakehouse
Twiddleybitz - Vintage Miss Mannequins (VTG001)
Twiddleybitz - Circle Doylie #2 (FRA019)
Flourish With A Bling - Elise Black Rhinestone (Flower)
Flourish With A Bling - Elise Silver Rhinestone
My2Angels - Silver bow
Brilliance white ink
Stazon black ink
Stamp In Style Verse - SMP21

Thanks for coming and I do hope you like my latest card :-)
Jen

Thursday, November 8, 2012

MHC Guest Design Team Member!!

I am so excited to be able tell you - I'm the current Guest Designer at Manorhouse Creations!!!

Manorhouse Creations supply beautiful flowers and blooms in almost every style and colour and have just brought out some BRAND NEW small Flowers - especially for Card-makers!!!

I have loved MHC from the moment I laid eyes on them and am completely honoured to be a guest designer.  I have so much fun with these gorgeous products - I hope you enjoy seeing my creations as much as I enjoy creating them!  Thank you again for this opportunity to share with you!

My work featuring MHC products can be seen:

My most recent creation (the blue flower glass brick lamp)
is only on the Manorhouse Creations Blog at the moment, but I will be publishing a tutorial for it in the next day or so :-)

And some more good news - Studio JenJen classes will regularly feature MHC products and a small number will be available for purchase.

Thanks for sharing in my happy news
Jen
:-)

Friday, November 2, 2012

Star Banner - Riley

I recently created this banner for Riley - he is definitely star material!  Each part of the banner represents a different part of him or something he likes/enjoys.


To cover the chipboard stars with the white patterned paper I covered them in pva:
 I used my speedball to push out airpockets and excess glue.
 I then cut around them with my craft knife.
The I coloured them with Distress Stains and wiped off any excess with a tissue.
The silver embossed stars are resistant to the colour...
Then I filed the edges:
 Punched the hole with my eyelet punch:
I used my Distress Stain to colour my white ribbon and again the embossed stars resisted the colour - and then I hung them to dry overnight. I was afraid I'd get too excited trying to dry them with a heat gun and melt the ribbon!
Once I'd panted the car red I used black liquid pearls on the tyres, and orange and yellow for the flames:

Car Star Ingredients:
Twiddleybitz - Star Banner
Twiddleybitz - Small Car Minni Minor (TRA004)
Twiddleybitz - School Dayz Kids (SCH003)
Alison Ellis Design - Star Paper
Adirondack Paint Dabber - Citrus & Red pepper
Ranger/Tim Holtz Distress Stain - Mustard Seed
Ranger Liquid Pearls - Pumpkin, Daffodil, Onyx Pearls
Flourish With A Bling - Silver Rhinestones
Black Artliner 0.2
1" circle Punch
My2Angels - White Star Ribbon

"R" Star Ingredients:
Twiddleybitz - Star Banner
Twiddleybitz - R (TAB00R)
Twiddleybitz - Dog form Farm Yard Friends (ANI002)
Alison Ellis Design - Star Paper
Adirondack Paint Dabber - Snow Cap
Ranger/Tim Holtz Distress Stain - Faded Jeans
Ranger Liquid Pearls - Dark Chocolate, Daffodil, Onyx Pearls
Flourish With A Bling - Silver Rhinestones
Flourish With A Bling - Pearl, Blue
Flourish With A Bling - Luke Flourish, Blue
My2Angels - White Star Ribbon
Brown Cardstock

"I" Star Ingredients:
Twiddleybitz - Star Banner
Twiddleybitz - I (TAB00I)
Twiddleybitz - Cogs n Gears (TABCOG)
Alison Ellis Design - Star Paper
Ranger/Tim Holtz Distress Stain - Peeled Paint
Ranger Liquid Pearls - Daffoldil
Adirondack Paint Dabber - Snow Cap; Red Pepper & Peeled Paint
Flourish With A Bling - Jessie Flourish, Red
Flourish With A Bling - Pearl, Blue
My2Angels - Bike Charm
My2Angels - Ball Chain
My2Angels - White Star Ribbon

"L" Star Ingredients:
Twiddleybitz - Star Banner
Twiddleybitz - L (TAB00L)
Twiddleybitz - Dinosaurs Pk4 (DIN001)
Alison Ellis Design - Star Paper
Ranger/Tim Holtz Distress Stain - Mustard Seed; 
            Fired Brick; Vintage Photo; Peeled Paint
Ranger Liquid Pearls - Avocado
Adirondack Paint Dabber - Snow Cap
Flourish With A Bling - Pearl, Red
My2Angels - Stick Figure Charm
My2Angels - White Star Ribbon

"E" Star Ingredients:
Twiddleybitz - Star Banner
Twiddleybitz - E (TAB00E)
Twiddleybitz - School Dayz Kids (SCH003)
Alison Ellis Design - Star Paper
Ranger/Tim Holtz Distress Stain - Faded Jeans
Ranger Liquid Pearls - Daffodil, Ruby Red, Baby Blue
Adirondack Paint Dabber - Snow Cap
Flourish With A Bling - Luke Flourish, Black
My2Angels - Cap Charm
My2Angels - White Star Ribbon
Black Artliner 0.2

"Y" Star Ingredients:
Twiddleybitz - Star Banner
Twiddleybitz - Y (TAB00Y)
Twiddleybitz - Tab Stars (TABSTA)
Alison Ellis Design - Star Paper
Ranger/Tim Holtz Distress Stain - Peeled Paint; Faded Jeans
Ranger Liquid Pearls - Daffodil
Adirondack Paint Dabber - Snow Cap; Silver
Flourish With A Bling - Jessie Flourish, Red
My2Angels - Ball Chain
My2Angels - White Star Ribbon
Dymo Labeller

I coloured in the island chipboard with paint and distress stains.  I used liquid pearls to give dimension to the grass and the palm trees, and age and deterioration to the treasure chest, and adding the skull n crossbones charm to finish it off.  I used crackle paint for my sand to give texture: 

"Pirate" Star Ingredients:
Twiddleybitz - Star Banner
Alison Ellis Design - Star Paper
Ranger/Tim Holtz Distress Stain - Mustard Seed; Peeled Paint; Vintage Photo
Ranger/Tim Hotlz Distress Crackle - Scrattered Straw
Ranger Liquid Pearls - Avocado; Dark Chocolate; Onyx Pearl
Adirondack Paint Dabber - Gold
My2Angels - Skull n Crossbones Charm
My2Angels - White Star Ribbon

Figuring out how to hang all the stars on the ribbon was probably the hardest part as I wanted them to all be attached differently!  The key to getting it right is working out the spacing, pinning to hold the spot and allowing for movement when hung - and thinking about if it will be hung tightly or loosely...

Congratulations if you are reading as you managed to get all the way through - well done!!  I'd love to see your banner so be sure to go to the Twiddleybitz Ning and upload yours to the gallery so I can see it too!!

Thanks for joining me :-)
Jen